When I began to plan making a houppelande gown I
pretty soon realized that I would also need a fancy wide belt.
Surprisingly, the belt turned out to be the trickier one of
the two in the end.
From the beginning I had my heart set on a super wide girdle
belt that would give some shape to the loose, voluminous gown.
When I took a closer look at the source images I noticed,
however, that my favorite form of houppelande, an early one
with a high standing collar usually had a narrow belt, while
the wide belts only appeared with the later houppelande
styles. In the end I invented a handy excuse for the
anachronism: If I was to make a burgundian gown, another late
medieval fantasy of mine, sometime in the future, it would be
so convenient to have a belt that would go with it too. So, a
wide belt it would be.
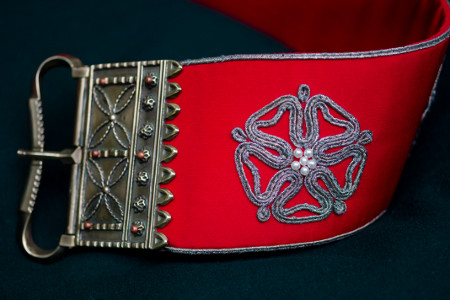
In the web store image the buckle looked silver colored to me, so I just kind of assumed it would be tin. I was a bit confused when the parcel arrived and revealed a buckle that looked more like brass colored. I had of course planned to match the belt metal fittings to my headdress with silver braid and my kirtle with tin buttons, so I was not very happy. In the end I reasoned, though, that perhaps a medieval lady might have cared more about carrying as much bling on her as possible to show her wealth than whether all pieces matched.
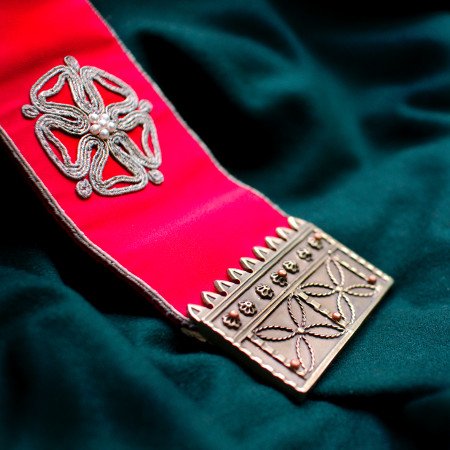
So, as I had an expensive buckle
and chape, I needed a fancy belt. My first ideas had been
something vaguely in the line of an embroidered velvet belt.
The designing was serious hampered by my absolute lack of
knowledge about what the belts in the tiny illuminations
really were like.
"The strap could be tablet-woven silk, or embroidered material mounted on a stiff backing, and long enough to reach the ground", according to Thursfield. In most images a houppelande is worn with a plain belt with large round decorations at regular intervals, probably some kind of large metal mounts. In a few images the belt looks like it could be a woven band, possibly tablet woven, though tablet weaving sounds a bit late for 15th century to me. I toyed with the idea of a brocaded tablet woven strap for a while, though, even made some experimenting, but in the end gave up the idea.
So, I was back in the beginning with an
obscure idea of a fabric covered belt. The large round
mounts seemed an attractive idea, but of course I couldn't
find large enough ones anywhere. Finally I came up with a
creatively anachronistic idea of creating the visual idea of
metal mounts with metal braid. There turned out to be a
rarely touched stash of the stuff at my workplace, so my
boss would sell me some. It was even in a shade of silver
darkened with age that almost shifts to a warmer shade in a
certain light, so it did not contrast too much with the
bronze/brass colored buckle. It was soutache braid, though,
only invented sometime on the 19th century as far as I know,
but I was willing to overlook this.
Next I headed
for the fabric store in hopes of finding something inoffensive
for the fabric base. I wished for a black silk satin sometimes
found in the local store, though I was quite ready to settle
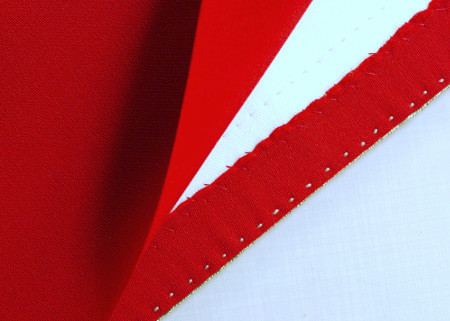
for velvet if all else failed. Imagine my joy when I stumbled
upon a thick fiery red silk crepe de chine. It was beautiful,
decadent, and the most expensive dress material I have ever
purchased in my whole life. Happily just a belt would not
require a very large piece!
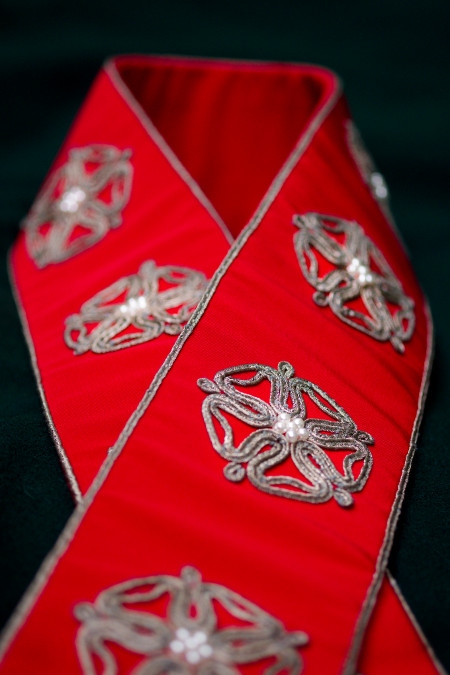
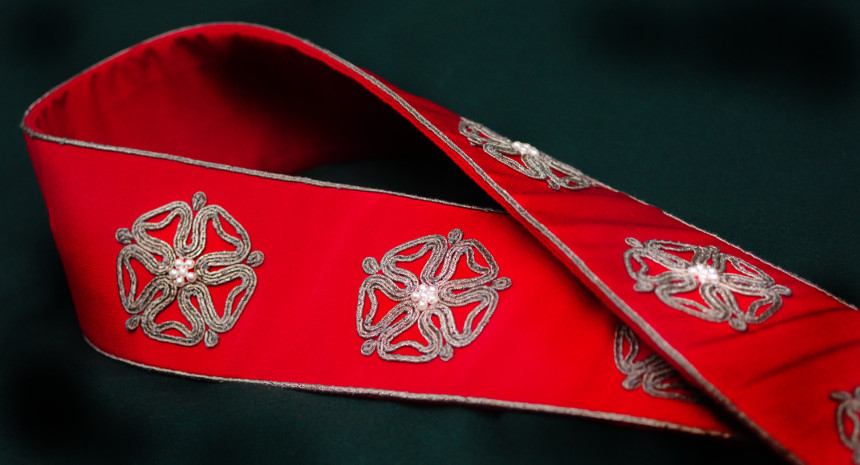
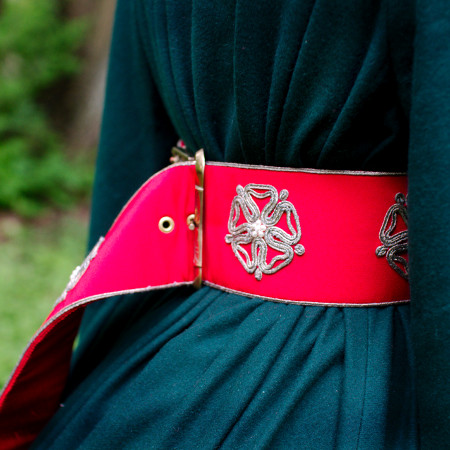
For the decoration motif I chose a rose with five petals, a common motif in late medieval decoration and heraldry. It gives roughly the same visual look as the round motif common in belts. The rose motif usually has also another round of smaller petals, but I they didn't work very well in the small scale of my work so I had to discard them. I made a test version on a patch, and after some small adjustments in the shape it looked rather nice.
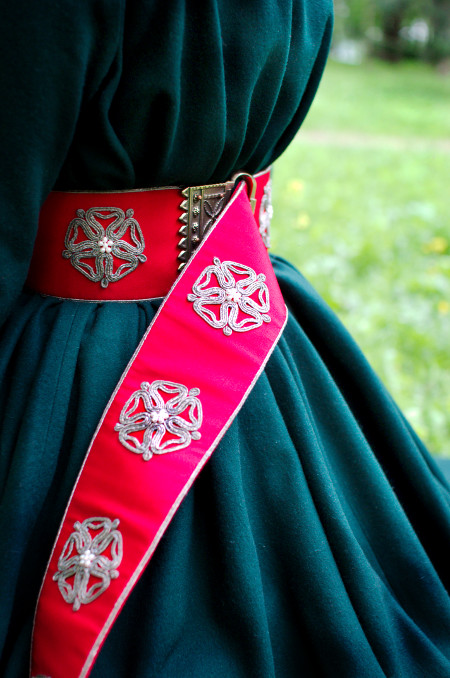
The width of the silk determined the belt strap length, about 140cm. Thus it's far from reaching ground as you sometimes see in period images, but at least it reaches hip level. I calculated an appropriate looking spacing for the roses and estimated the place of the eyelet for the prong, and basted marks for them. Then I basted the silk on a 9cm wide strip of cotton coutil. I know it's a too modern material, but sturdy and reliable.
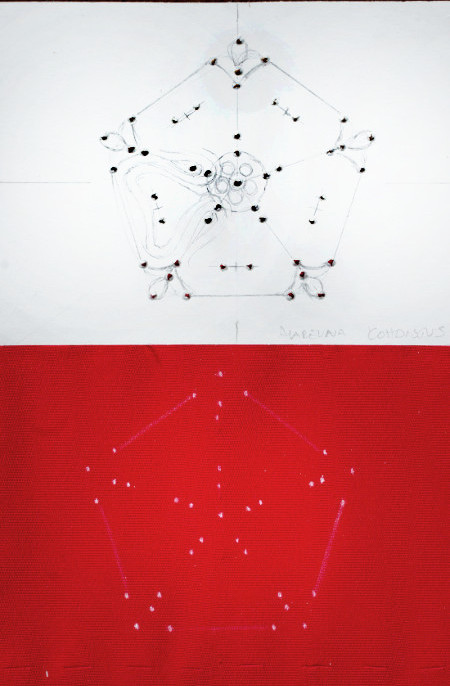
I had made a
cardboard pattern with punched holes, and used it to mark
the key points of the design. Then I punched a hole in the
beginning point with an awl and slipped the end of the
soutache braid through it to the wrong side. I stitched the
braid on at the center groove with tiny running stitch. I
used a heavy drab colored thread that disguised surprisingly
well in the shiny braid.
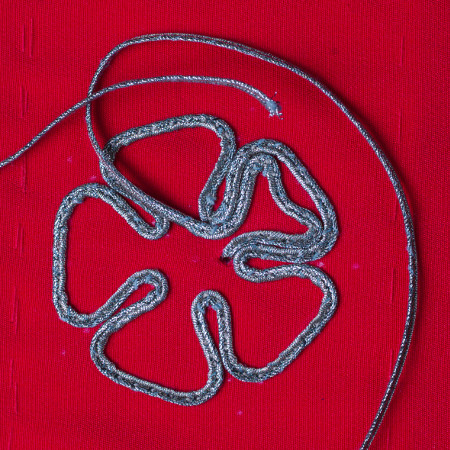
I worked the outer
edge of the rose first. At this point it look disturbingly
reminiscent of a late 90's hawaii-print. I slipped the end
of the braid underside through the same hole it had come up
from, and punched another hole at the base of the next petal
to bring it on the right side again. Then I continued with
the second round, which gives the petals the inward-curving
shape and fills up the design. For the last thing I added
tiny braid loops between the petals to suggest the sepal.
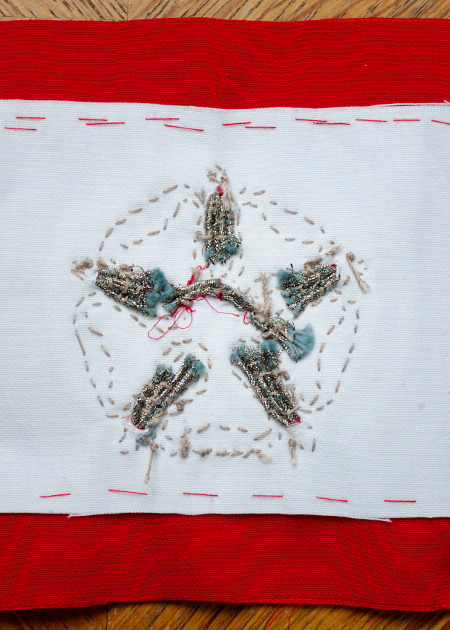
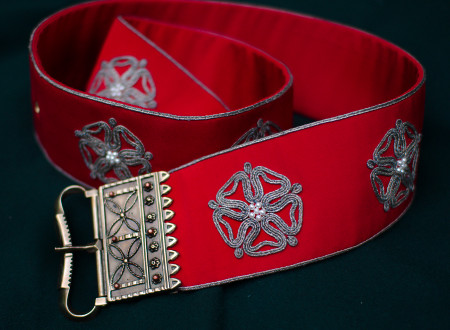
The belt got 11 roses, and working on them went surprisingly quickly and effortlessly. The only annoyance I had was that the braid surface cracked very easily when it bent of the corners to reveal the light blue cotton thread filling. I tried to cover the spilling out base thread with stitches at the worst places, but got too tired and frustrated the work through them all. Happily the shiny metal fools the eye enough to disguise the unevenness from some distance.
Although the coutil interlining supported the silk very neatly, a problem I hadn't anticipated appeared with the awl-punched holes. They created a visible strain on the silk. On the other hand that would have been had to avoid as I didn't want to cut the silk threads, fearing it would begin to fray.
The belt was supposed to fit rather snugly, so it might face some stain on the wear. I was especially worried that worn under the bust it might begin to collapse and wrinkle, not to mention how the heavy chape might pull it down. Thus I needed a sturdy base for my fancy top layer. A sturdy leather base might have been the period correct option (Perhaps), but I ended up with a totally modern solution based of what I found on the stash.
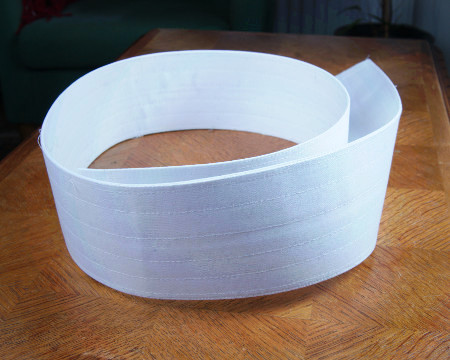
I made the base out of two 18cm wide pieces of coutil, reinforced with a 9cm wide heavy duty fusible interfacing, the edges turned inside to meet at the center. This made the base 4-layers thick with two layers of interfacing.
I stitched the coutil pieces together at the edges and added several rows of machine stitch in between to keep the inside from wrinkling when rolled up. The base is neat and very sturdy without being way too thick.
I basted the
embroidered top layer of silk and coutil on the top of the
base, leaving it just a bit loose so that it would curve
smoothly over the belt. Then I machine stitched it on very
near the edge. I turned the silk seam allowances on the
underside of the belt and whip stitched them on the base.
Then I carefully picked out the machine stitch.
Next I stitched a line of the braid on the belt edges
through all the layers. It's a detail you sometimes see on
the period images (or rather a painted line that might be
some sort of decorative belt edging), and it worked well
to strengthen the construction with an extra stitching.
I covered the underside of the belt with the same silk. I pressed the seam allowances to turn under on the lining strip before pinning it on. On the part of the belt that would go around my torso I pinned it tighter so that the belt would curve naturally. I sewed the underside on the edges by hand.
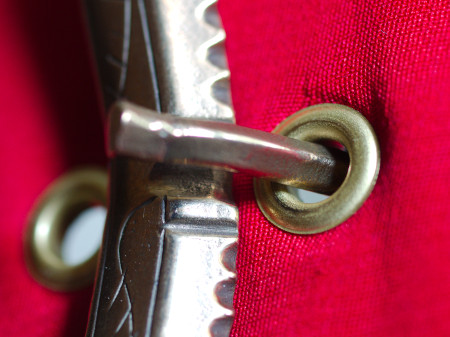
Now remained the part that I was most anxious about, inserting the metal parts. I'm notoriously technically disabled and can't manage anything with bolts and screws. I began with the eyelet, as it was the least scary, and I also reasoned I could try on the buckle placement once I had the eyelet. I bought a packet of large metal grommets for it. I forced the hole with an awl, but this time I had to cut some threads to get the grommet in. I further reinforced the eylet with some stitching, then maneuvered the grommet in. With incredible luck I managed to hit the grommet straight for once, and got a very neat prong hole.
(The first time I wore the outfit I noticed that the belt could well be tighter to keep it from slipping downwards, so I had to add another grommet)
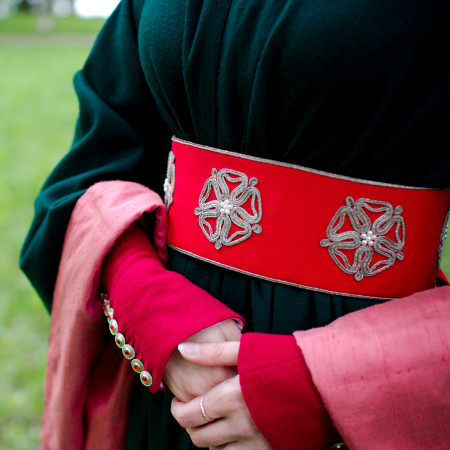
Putting on the buckle and chape was, however, a truly harrowing experience. I had somehow managed to make the strap just a few millimeters too wide, and it just would not fit neatly. I also noticed that the belt should really be tighter than I had originally estimated, so I had to move the buckle inwards, thus messing up the symmetry of the (formerly) evenly spaced roses.
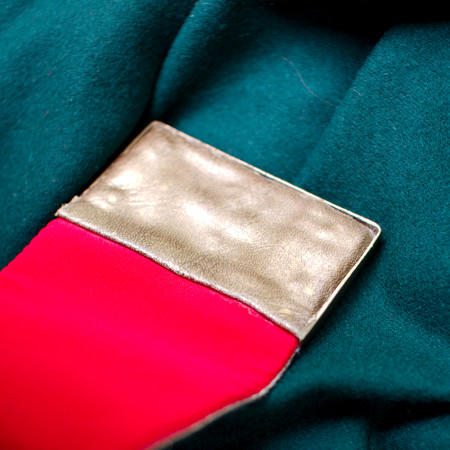
I punched holes for the bolts on the strap, placed the buckle on the top and after some maneuvering managed to get all the bolts in their places. This was of course made a bit more tricky by the too wide strap that wanted to bulge out. Even though Jarno helped me a bit to punch the washers on some of the bolts still ended up totally crooked. As the buckle shipment didn't include any kind of plate to hide the messy underside, so I resorted to a piece of leather and glue. On the chape end I coated the leather with alternating layers of gold and silver spray paint to create a shade that would match the metal. I even managed to push most of the leather edges between the strap and the metal edge, which made the underside of the chape look reasonably presentable, though it's still far from smooth and even.
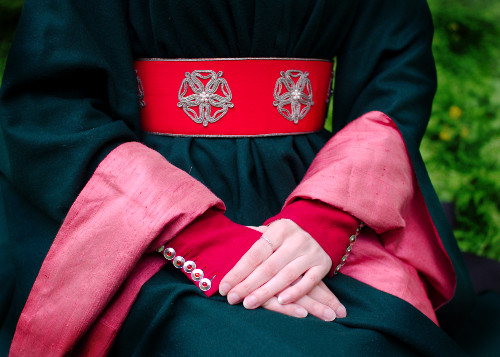
To my great annoyance I noticed only when looking through the photographs that I had put the belt on the wrong way when pulling on my houppelande over the kirtle for the photoshoot (in a park, without a mirror), and thus the roses were upside down. Oh, well. It's meant to be the other way round.
The belt has several small imperfections, but then again some parts of it were rather out of my usual range. From some distance it looks fine, though, and really brings some sparkle to the dark toned houppelande.