Cotehardie,
2015
Sarah Thursfield's "The Medieval Tailor's Assistant" was the first book on medieval clothes I bought when I started, and I seem to follow it rather faithfully. Now, sparked by a nice fabric bargain, it was time for the cotehardie. "Cotehardie" is a term that's generally used somewhat confusingly about several types of fitted late 14th century dresses. Following Thursfield I call this short sleeved, buttoned overdress a cotehardie, but for a further reading on fitted 14th century dresses and the confusing terminology I recommend some excellent articles on La Cotte Simple, "The elusive feminine cotehardie" and "The versatile dress layer".
Tippet.fi sold a lovely light weight plaid wool on a very affordable price some time ago. The gentle plaid on shades of cream, greay, white and teal blue went well with my old light blue kirtle. The kirtle was beginning to show signs of wear, especially at the hem, so I thought a new overdress would brush it up and still leave the main detail, the buttoned sleeves visible.
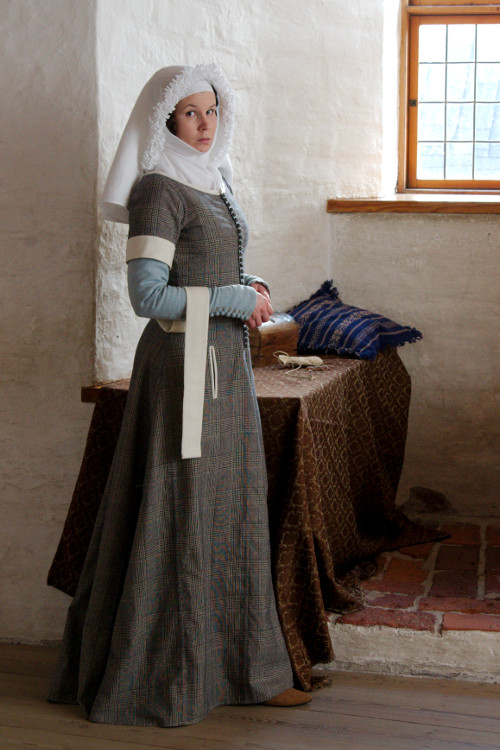
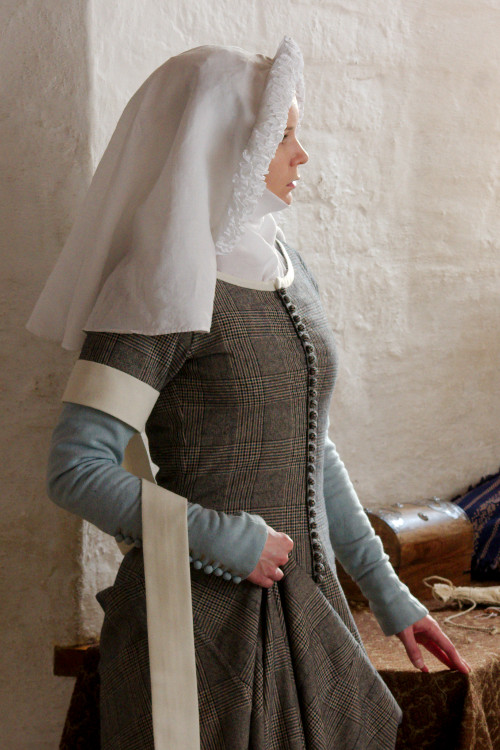
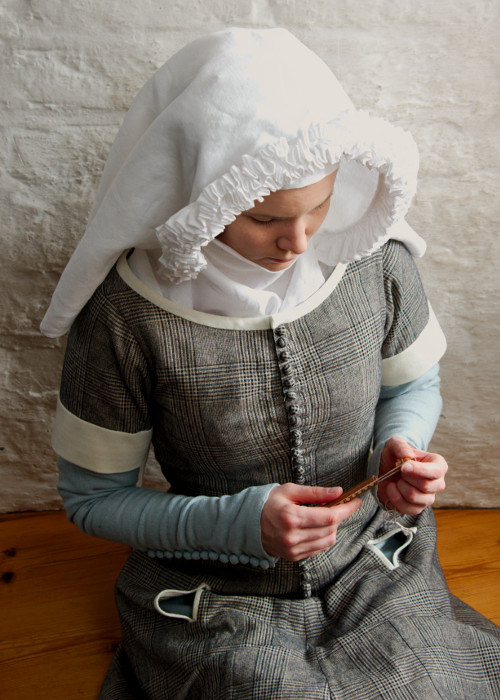
The combination of the kirtle and the new cotehardie was in my mind designed to be something like 14th century smart casual. The outfit has the favorite fashion elements of the time, long rows of buttons and long hanging tippets, but the color scheme is rather modest and laid back, even plain. Actually I'm not even sure if such a combination would be very probable in a period that obviously loved bright colors. On the other hand, after some more fancy and blingy court wear I have been also sewing recently the beauty of the more down to earth shades had a strong visible appear for me.
I copied the pattern from the kirtle, just lowering the underarm by 1cm and adding 0,5cm extra allowance on the side seams. I also drafted the neckline a bit higher. The sleeve came from the short sleeves in my linen kirtles, I just lowered the underarm to match the bodice.
Then there was the small matter of cutting a plaid dress. I wanted to cut the hem with gores to reduce the fabric waste, but the plaid made that a bit more complicated. I ended up joining the gores to the main pieces by combining the straight edges, unlike usually when you sew the bias edge of the gore to the straight edge of the main piece. This way I could cut the plaid to continue on the gores without interruption, just like it would had I cut the dress pieces flared without gores.
Is carefully matching the plaid even in the economical spirit of the period? I have no idea, but being bit of a perfectionist I just had to try to get the plaid as continuous as possible, even though it's rather subtle, especially from a distance. This of course caused some more material waste than happens in a plain gored dress. Happily the wool was generously 160cm wide, so in spite of cutting away a few centimetres between the pieces I got a wide wide hem. I followed my habit of cutting the center front gore narrower than the rest, and as I had a generous fabric width I also cut the center back gore slightly wider than the side gores this time. I also cut the back pieces and gores a bit longer.
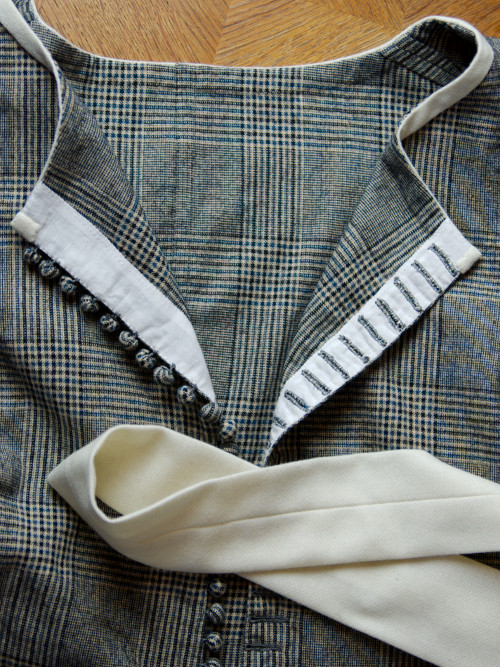
After cutting the pieces I stuffed most of them in a box and began with the front pieces. I sewed a strip of thin, densely woven linen on the underside of the buttoning edges for reinforcement. The center front of the dress is cut slightly curved at the bust as the plaid helpfully demontrates, and to get the curved edge to fit the straight linen strip I gathered the edge a bit at the bust area. This also works to shape the bust better, as the gathering kind of works like a small vertical bust dart would. This is something I have absolutely no documentation for, but which I have found a useful trick.
I sewed the linen strips on the front edges by machine but sewed the other edge and top stitched the front edge by hand. Then I marked the buttonhole places, setting them 1,5cm apart following the kirtle sleeve buttoning. I sewed a round of machine stitch around the buttonholes and then worked them by hand with a silk thread. The single front piece folded into a neat little handbag-sized bundle, and I carried it with me for some months, making a buttonhole or two whenever I had spare time and nothing more urgent to sew.
At some point I also put together the back part of the dress. I joined the seams by machine, which was for once seriously annoying as the soft material stretched endlessly and the plaid just didn't meet no matter how many pins I used. I trimmed the seam allowances and pressed the seams into flat felled seams, which I finished by hand. That, in turn, was very relaxing, as my stitches disappeared miraculously in the small plaid even if they were not very delicate all the time. I had, though, been too careless when trimming and ironing the seams, as they ended up rather wide and heavy. Turning a period-correctly narrow flat felled seam is no task for the impatient.
When I had made most of the buttonholes it was time to join the gores, close the center front seam and finish the ends of the linen tapes at the bottom edge of the front opening. Then I could make the last few buttonholes, and then switch to the buttons.
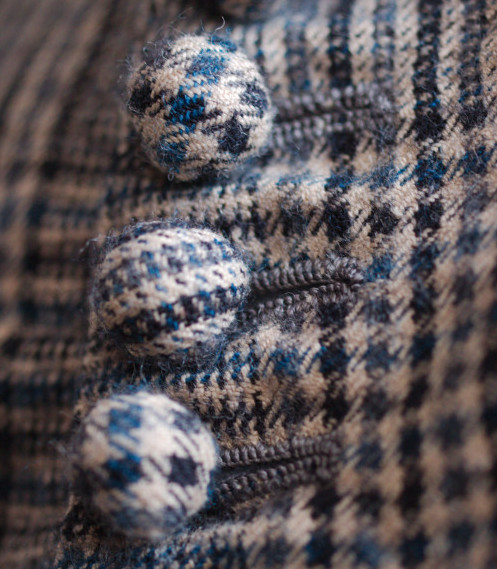
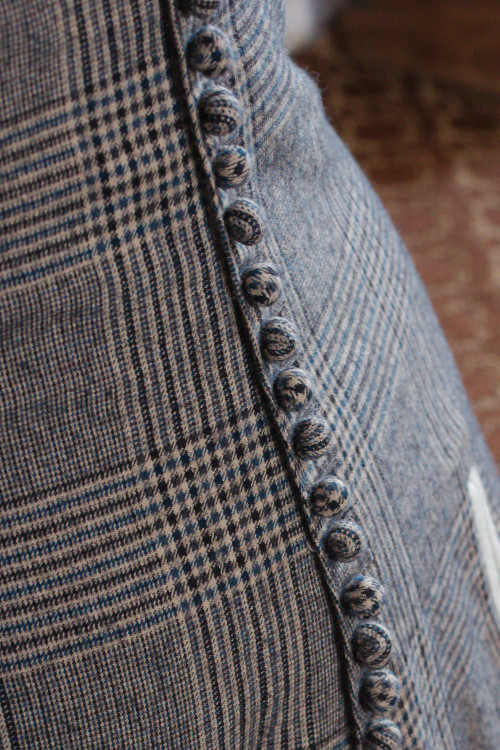
Following the kirtle I made round fabric buttons for the cotehardie too. Fabric buttons made from the cutting waste are also very economical, a long row of fancy metal buttons can easily double the garment cost. Making fabric buttons is also fun. I went overboard with my plaid perfectionism here too, making every other button in plaid and the others striped.
When the buttoning was finished I could at last sew the side seams and try the dress on. It was a bit too large. Obviously the extra allowance I had put on the side seams was unnecessary in the light and soft material. The generous gores also added quite much extra fabric at the hip area, which looked tacky at least to the modern eye. I wanted a smoother, more fitted line, so I took off the extra allowance on the bodice and a bit more at the hips. This had the side effect of dropping the heavy bulk of seam allowance where the side gores meet lower, which also helped to get a smoother fit over the hips.
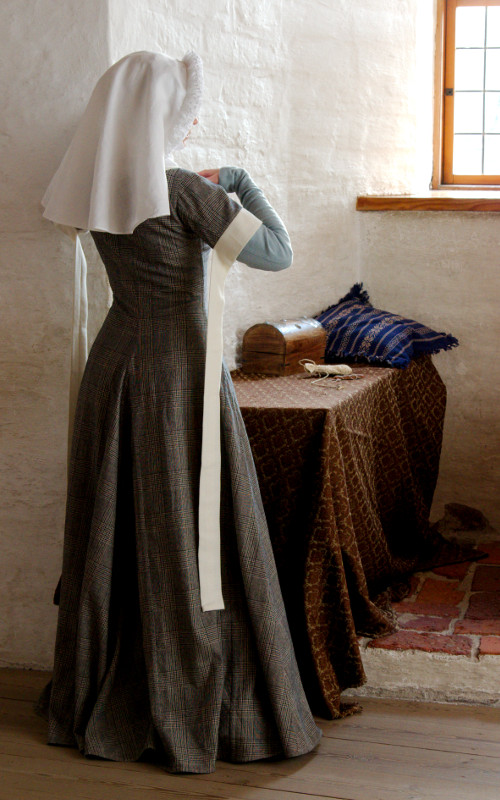
As I had cut the dress with generous length it almost trailed the ground. I had originally thought to make the dress with "practical" off the ground length, but the trailing hem just looked so good I didn't have the heart to cut it shorter. Besides, trailing hems were the period norm for fashionable wear. I comforted myself with the thought than the gray-toned plaid would disguise some inevitable dust and dirt.
I had cut the sleeve a bit loose on the purpose, so that it would settle smoothly over the kirtle sleeve. Happily the extra allowance on the sleevehead settled neatly on the soft material.
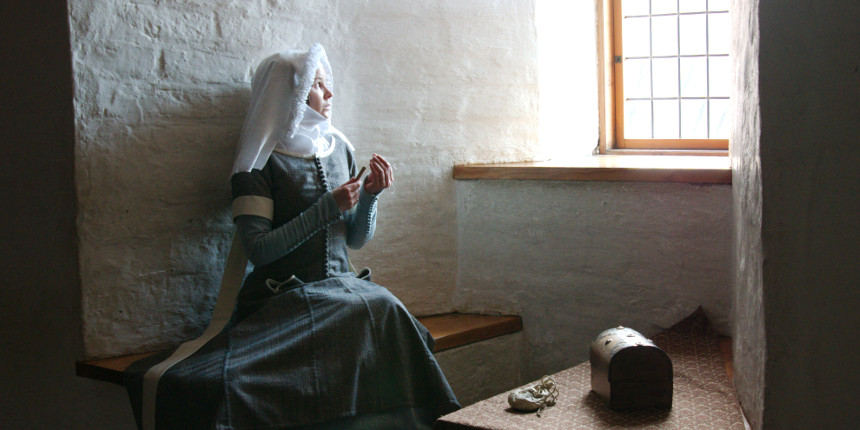
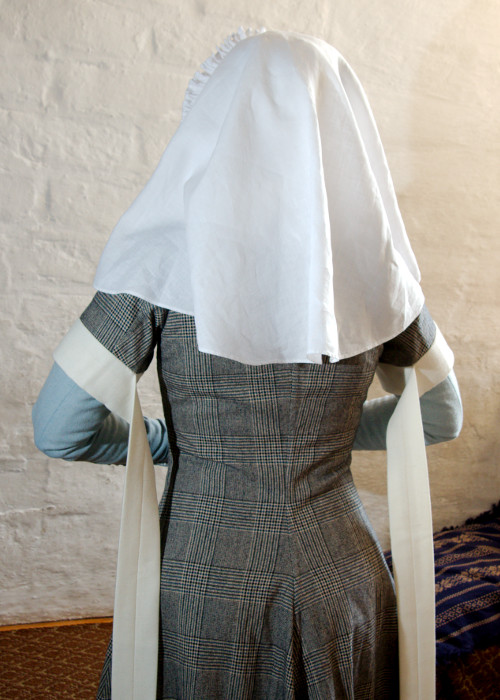
I had wanted the 14th century fashion fad, the long cloth strips called tippets on the uppers arms on this dress. According to image sources they are usually white and thus, I imagine, rather impractically prone to gathering dirt. Happily I came across a piece of cream wool blend that would survive a machine wash now and then.
I sewed the tippets as doubled tubes of material, placed the seam on the center of the underside and pressed them flat. Then I basted then lightly on the sleeve end at the upper edge so that they are easy to remove in case I want to wash just them.
In the period images the tippets often appear with vertical slits at the hip level edges with similar white material. The are meant for reaching your purse or whatever you have hanging in your belt which would be worn under the top dress. I wanted to include them too, as they make a nice design element that makes the tippets appear less random.
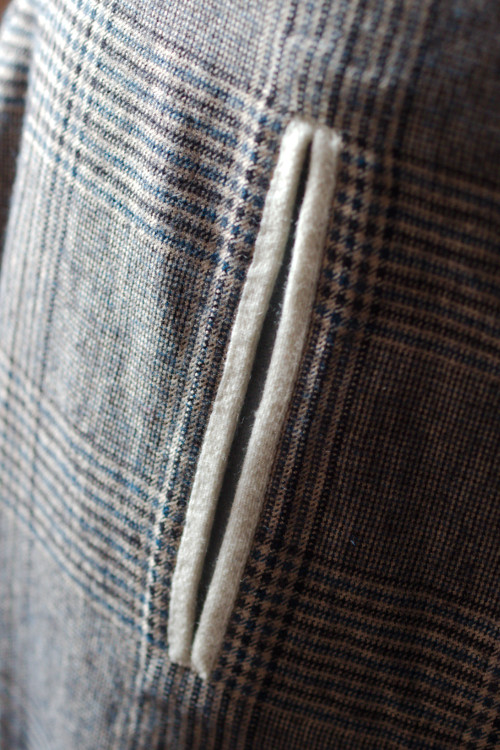
I made the slits on the finished dress, as I felt I wanted to check their placement when I could try the dress on. I made them without any further research roughly the same way as a modern pocket slit, which is probably no way period. In the period images the edging also seems to be much heavier, which I kind of noticed after finishing them.
When studying a few images very carefully I noticed that some dresses of this type also had a white edging on the neckline. Possibly it might indicate a white lining. I thought it looked nice, tied in the other white details and also gave the rather small neckline a wider look. So, I added that too as an last minute idea.
Some pictures also had a wide white band at the hem. This would of course have looked lovely, but I left it off for obvious practical considerations. Not that the cream left off-piece I had bought from a friend would have allowed that either.
The cotehardie was a very nice, apart from the few seams with plaid matching a very relaxing project, that actually came together rather effortlessly in the midst of some other more elaborate stuff. I really like the outcome, it's both pretty in an understated way and also comfy. Thanks to the light material it's not too hot when worn over the kirtle, but rather nicely warm fro winter events.
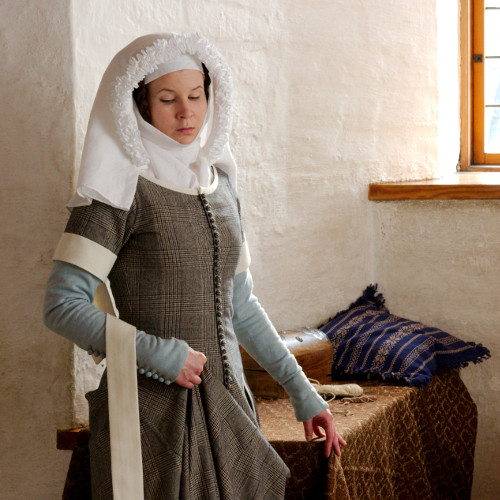
For the photoshoot I was also inspired to make a quick try on another late 14th century fashion fad, the frilled veil. I found a nice, easily tutorial here, though my frills ended up wider and slightly less dense.
Lastly, I'd like to thank The Häme Castle and The National Museum of Finland for the photoshoot location.