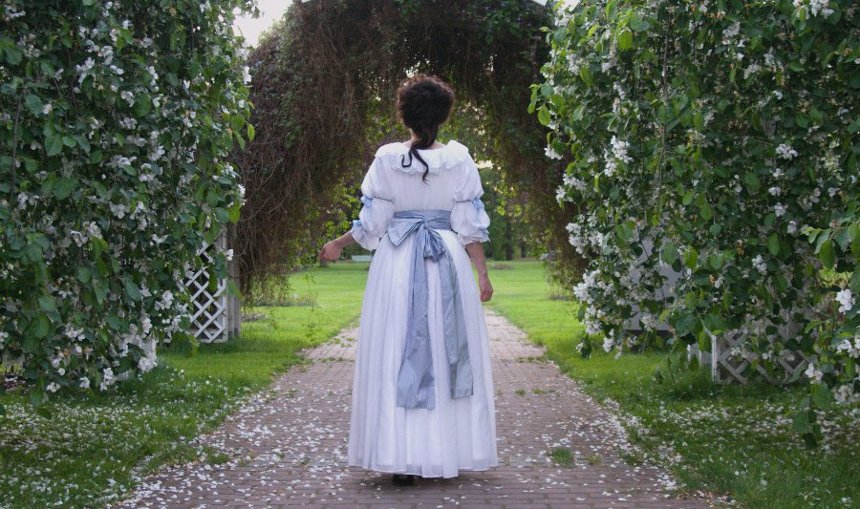
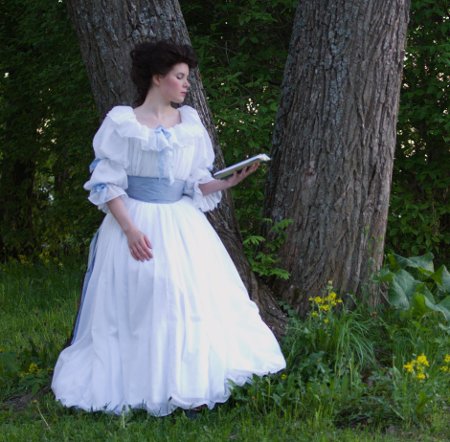
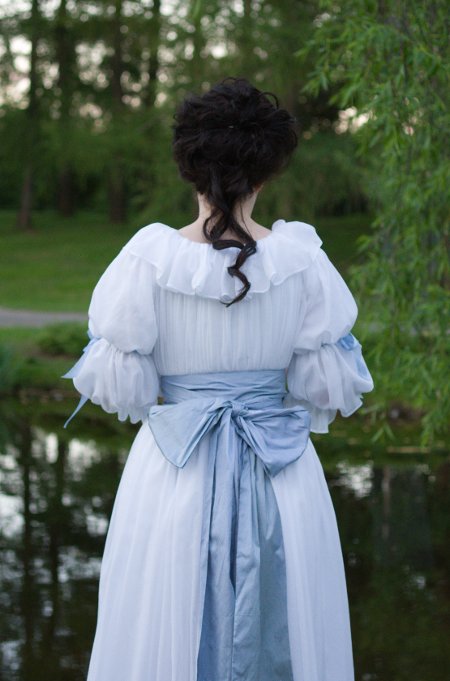
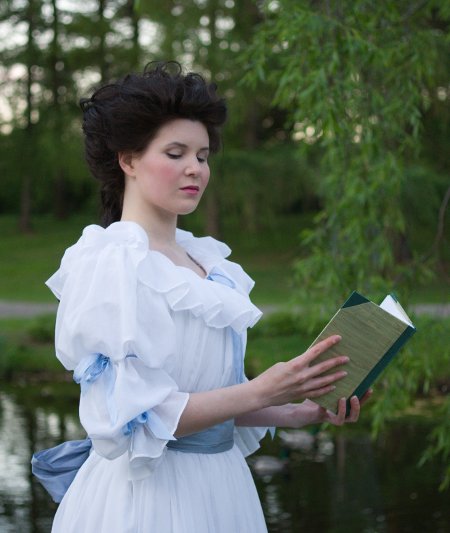
Chemise á la Reine, 2011
The simple muslin dress, made iconic by Marie Antoinette in the infamous Vigéé Le Brun portrait is the total opposite of the glittering and elaborate court fashion of the time. It's almost a forerunner of the empire styles that followed at the end of the century.
Originally the things that made me fall in love with 18th century were the silhouette formed with hoops and stays, ruffles, silks and high coiffures, and this style seemed cute but rather boring. Still, they have their own subtle charm, and somehow I ended up making one of my own.
There were also practical reasons for this: I wanted something new for the Viapori Vauxhall - event in May, but even though I had some lovely fabrics in my stash I didn't have enough time for what I had planned to make of those. And as I had fabrics, if I wanted to buy something else it would have to be cheap.
Choosing the style
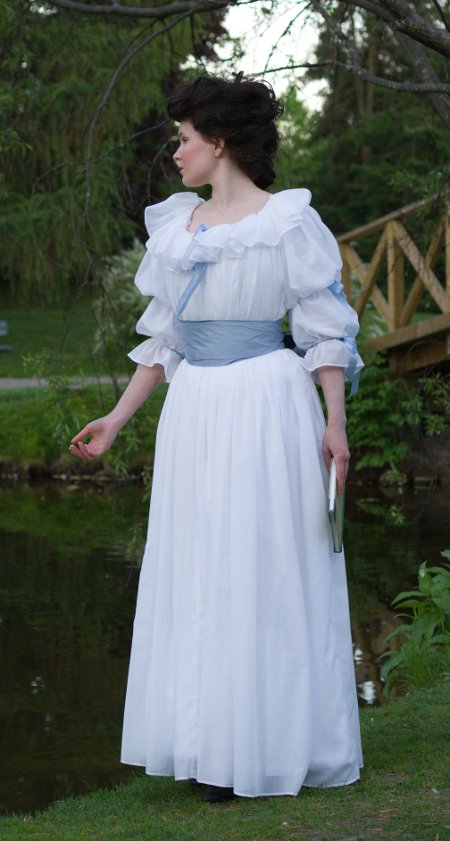
The basic dress evolved into many different styles. I chose the one in the portrait: Really simple, gathered sleeves and wide ruffle at the neck. The ruffle would also cover the possibly messy bodice gathering.
The neckline ruffle could sometimes be in lace, but it can be hard to find a period-looking lace, not to mention expensive. I also wanted to keep the characteristic simplicity.
It seems that this type of dress was worn both with and without stays (though there might have been less rigid supportive garments involved). I chose to were it primarily with stays, because without a defined waistline it might make me look like a Moomin, and while I'm Finnish that would be a bit too much. Happily my stays also happened to be white.
The Material
I found IKEA muslin curtains for 9,90 euros for pair and bought two pairs to get a really fluffy dress. They were regrettably a poly-cotton blend, but I wasn't choosy and thought the fabric might even be more durable than all cotton. (Later I was ready to admit that the fabric could breathe more).
Pastel blue was a rather predictable choice for the sash and bow tapes, popular on the era and generally one of my favorites. I was even lucky enough to find silk ribbon, and double lucky to find matching dupioni for the sash. The sash became the most expensive part of the dress.
Drafting the pattern
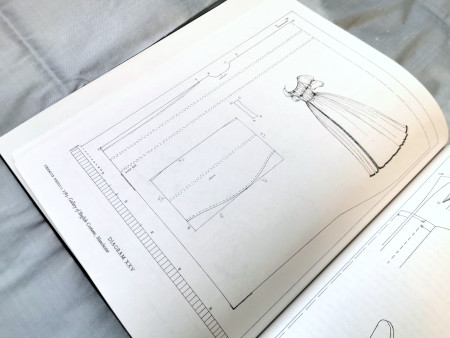
This kind of loose dress doesn't need a very elaborate pattern, of course, but as Norah Waugh's "The cut of women's clothes 1600-1930" had one I based mine on that. I especially liked how the sleeve was set on a separate shoulder piece instead of a chemise-style sleeve seam hanging mid-arm.
I copied the sleeve pattern from the book but had to lengthen it quite a bit. I had some qualms about it, though: I refused to believe that the almost straight top edge of the sleeve would fit well on the shoulder, so drafted it more curved.
In the portraits you see both low and relatively high cut necklines, the latter giving a more soft, rounded effect. I chose to cut mine somewhere in between. I copied the shoulder pieces from my stays pattern (shortened, of course). I measured the front and back neckline width on the dummy.
At the planning stage I had pinned fabric on my dummy to test the right width. All four curtain widths sounds like a huge amount of fabric, but that's what I ended up using. It's more than in the Waugh pattern and some repros, but somehow it seemed to work.
Sewing the dress
Jenny La Fleur's dress diary was hugely helpful in figuring out the construction of the neckline and shoulder piece. Once again I have to say thanks to people who share their experience for free!
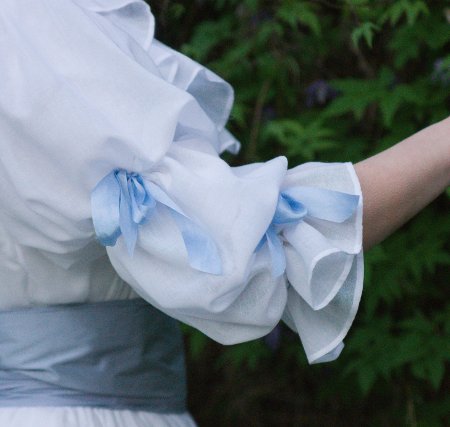
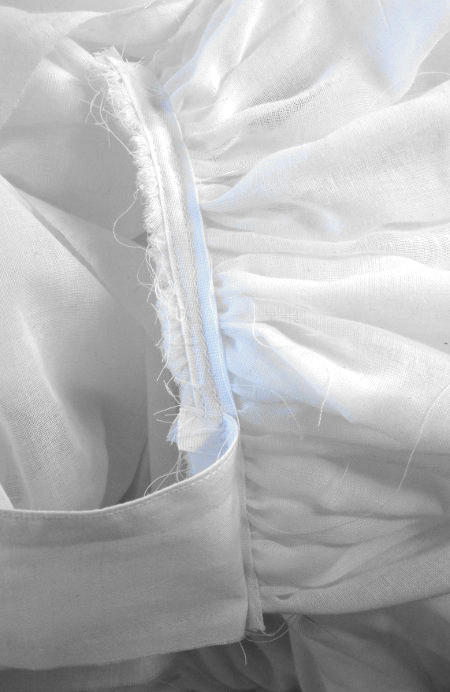
I began, as usual, with the small but time consuming pieces: The neck ruffle and sleeves, a lot of hemming. On the sleeves I sewed tapes of the same material for the gathering. Then I closed the seams and finished the tape tunnels over it, leaving a gap for threading the gathering tape.
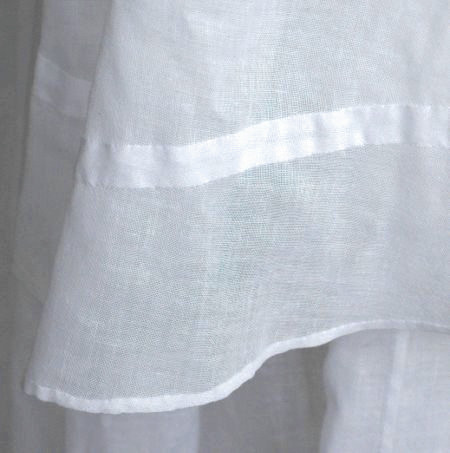
The dress in the book has the whole front edge left open, closed only with the gathering cords at the neck and waistline. It seemed more practical to me to close the seam at the hem and leave a slit at the top part for dressing. I used french seams at the front and back (later sides, too) and hemmed the slit edges by hand.
Another thing that I was dubious about was that, according to the dress description, the back width is gathered to a binding on the neckline, but at the front it's gathered with tapes. That's logical but I had a feeling the front gathering might not look all that neat, and what about my ruffle? I decided to just gather and bind the front too and sew the ruffle on the top.
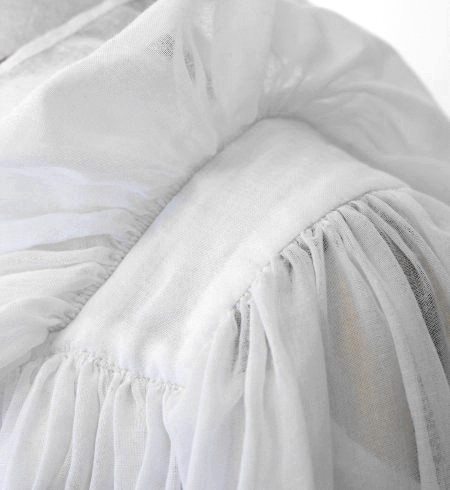
The underside of the shoulder pieces is in slightly heavier muslin, and to further keep it from stretching and support the ruffle I sewed a cotton tape on the neckline edge. Then I sewed gathering threads on the top of the front and back pieces.
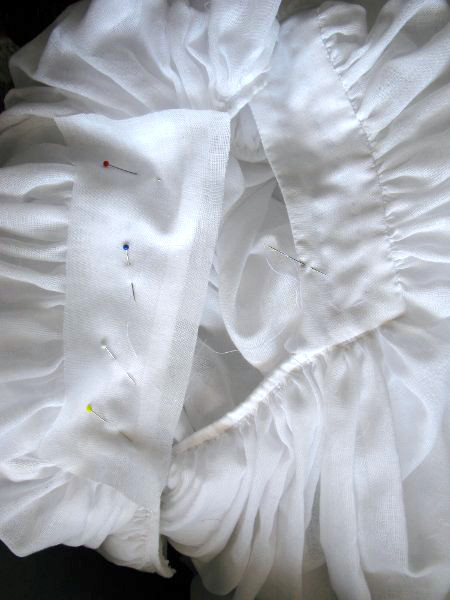
Though the fabric was very lightweight and sheer it was still quite a hassle to gather a 270cm edge to 31cm. I began with the back, and after gathering sewed it into the shoulder piece and binding on the neckline. As I should have anticipated (but didn't), the binding stretched several centimetres. On the front piece I was wiser and sewed the gathered edge first into a sturdy cotton tape before finishing the edge with self-fabric binding.
In the picture below is the wrong side prior to binding the edge.
I hadn't bothered to calculate exactly how much fabric I needed for the sides beyond the shoulder pieces, but just left a generous width. After gathering the neckline I tried the dress on. Boy, it was huge in every direction! I pinned the side seams and marked the armhole. I cut off the extra material left over, and after this the dress circumference settled to 540cm. I sounds seriously over the top but gives a nice, full shape, especially on the skirt.
I closed the side seams and sewed the sleeves on, first on the armhole, binding the seam allowance, and then gathering the top and sewing it on the shoulder piece. As mentioned above, I had ended up drafting the sleevehead curve higher. The result seemed pretty, even if it might be a modern view.
At this point all the sewing allowances were turned on the top of the shoulder piece lining. I stitched them on to smooth the gathering and then sewed a piece of the dress muslin on top by hand, turning the seam allowance under. I guess I could have stitched it on by machine as it would be covered by the ruffle, but the handsewn result looked so lovely.
Then it was time for fitting again: I tied a tape on the waistline and marked the line for the gathering tape following it. Here I deviated from the original pattern again, as I decided to make just one gathering line instead of two to get a really rounded and fluffy look. When I took the dress off I noticed that while in the pattern the gathering line at the waist had been straight, according to my fitting it dipped slightly downwards at the front. As it had seemed good on the fitting I kept that.
As I was beginning to run out of time I sewed the self-fabric tape for the gathering ties on with machine. It would be covered by the sash anyway.
After gathering the waist the dress looked less huge and shapeless, and rather pretty. I had originally thought to wear with with a bumroll but now I felt the hem was full enough for my taste as it was. A tiny train would have been lovely but I deemed it too impractical as it might get soiled and torn pretty soon.
Then all that was left was to hem the dress and sew the neck ruffle on. I had luckily recently come across the mysteries of "whipped gathering"- technique which gave a lovely look. The last thing was to make the sash.
And here comes a dirty secret: I had originally gathered the sleeve puffs with narrow cotton tape, but after the first wearing I became so annoyed with them slipping down that I later replaced them with elastic band. The silk ribbons are just tied over the gathering lines.
Conclusion
I finished the Chemise á la Reine just in time for the ball, and it I think it really came to its own on a balmy May evening. After that it's become a pique nique favorite, as it's relatively cool, carefree and washable. It also fits anyone who is even somewhat close to my size, with possibly a bit of temporary hemming, so I've lend it to many people who are either new to the hobby, musicians or models for a historical fashion show.