18th century accessories
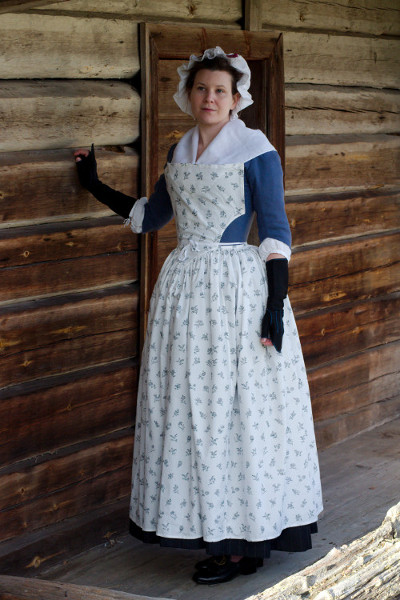
Apron with bib, 2020
During the spring 2020 I suddenly had a bit of much needed extra time to go through my stash and cut a few new projects that had been long in planning. One of the more modest ones was an apron from the Costume Close Up-book. It's not such a vast undertaking, but something that I had never quite gotten myself to start.
The wide apron with a cute bib is very pretty, and would also protect the garments worn beneath it to some extent. The original piece is made in printed cotton so it's probably meant to be worn more as an fashionable accessory than for any real work with danger of soiling. I wanted an apron that would work for both depending on the situation: both decorative and something that I could wear in the kitchen or just quickly throw over my ballgown if I needed to visit the kitchen quarters or help out in carrying food.
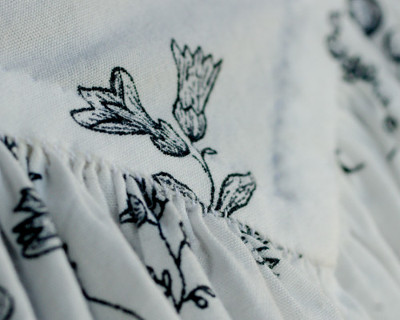
I had a lot of basic cottons and some linens in my stash, but I chose this pair of small Ikea curtains I had found in a thrift store. The fabric is not very heavy but densely woven and has a durable feel, so it would be a practical choise, but the small sprig pattern would also add the fashionable touch without being too loud.
I cut the apron based on the pattern given in the book, but with measurements adjusted to my size and wishes. I cut the skirt part wide with one join (224cm in total) to cover even a wider skirt worn underneath from the sides too.
The bib is shaped similarly to the pattern (without the piecing, which I was too lazy to replicate as I had ample amount of cheap material anyway), but I adjusted the measurements to my bodice patterns. The total length of the bib is 35cm, while the width is 38cm at the top edge and 19cm at the waist.
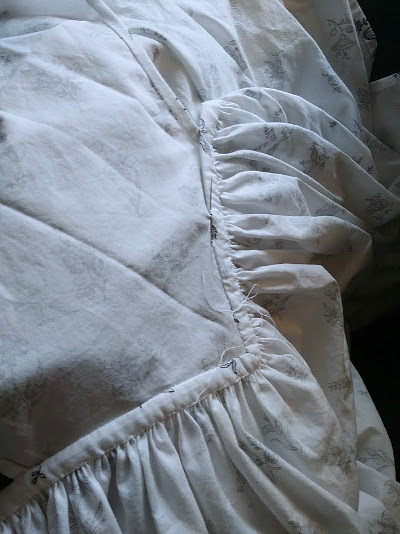
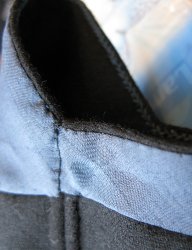
I hemmed the apron and bib by hand, mostly while sitting in a car. Then I run a gathering thread on the top edge and sewed it with a whip stitch to an 8 mm wide folded waistband, and added cotton tape ties.
I had marked the center line and the points where the bib is attached at the sides. I ironed the bottom edge of the bib to turn under and sewed it on top of the waistband with slip stitch. Then I sewed the top of the waistband on the bib on the wrong side to cover the seam allowances.
The original apron shows signs of wear and strain at the waistline, and no wonder: the dipped shape of the bib puts a lot of strain on the single layer of fabric and especially the side corners rather than the much more durable waistband. Still, this cut looks very pleasing to the eye and is much more flattering to the figure than a round waistline. If mine begins to show too much wear I may have to add a sturdy tape for reinforcement on the underside of the bib waistline, but for now I wanted to make the garment like it was originally meant to.
So, now I'm only waiting to get to organize a ball or even a tea party again!
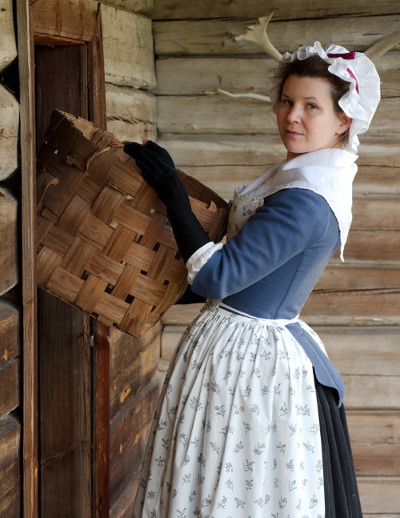
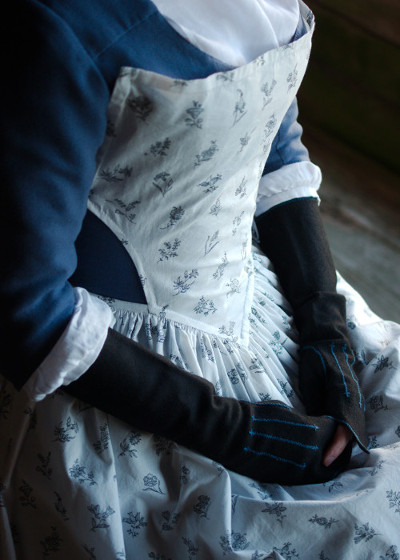
Mitts, 2010
Fingerless mitts were popular on the 18th century. I think there was some etiquette reason for that too, but they must have also be worn for warmth with the elbow-length sleeves - that's what I made mine for, at least.
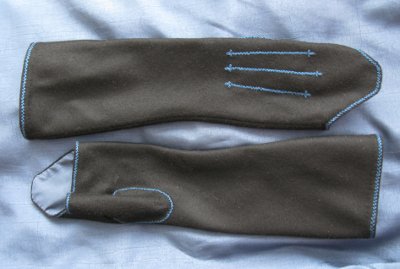
For the material I chose black wool - warm and more or less goes with all my garb. The pattern for the mitts was found at this page. The scaling they give must be either wrong or meant for a child, but when I scaled them up enough, measuring my hand, I managed to get quite good fit.
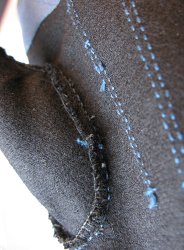
The main seams are done with a machine, all the finishing by hand. Following some existing period pieces I lined only the top edge, the wrong side of which will show. Lining the whole mitts would have been more complicated and made them stiffer.
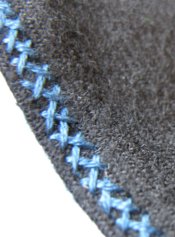
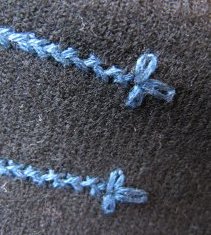
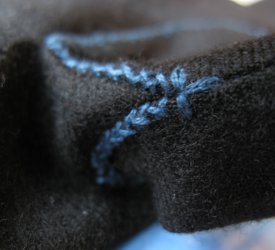
The mitts are decorated with herringbone stitch, which seemed to be a common decoration. For the color I chose dark blue, which also goes with most or my clothes.

Muff,
2010
I had been planning to make a muff with my cloak for a long time. Unlike the year before, this year the weather at the time of the Christmas Ball was actually something more like it might have been on the 18th century - very cold. So, now I really needed a muff.
I made it out of the same blue satin as the cloak, and lined it with wadding and woollen cloth. The ends are gathered with a ribbon. It's quite warm, though wind still gets through it.
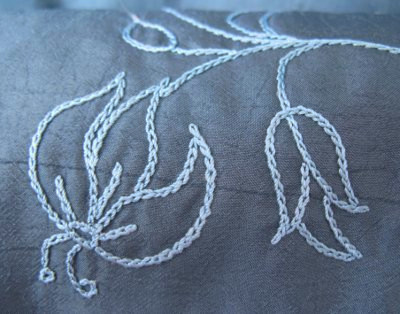
A basic satin muff felt too boring, so I wanted to have some embroidery. As I didn't have very much time I drew a very simple design and embroidered it with chain stitch.
The thin satin is backed with cotton batiste, on which I copied the design. Then I basted it so the design was transferred on the outer side. For the embroidery I used buttonhole silk thread.
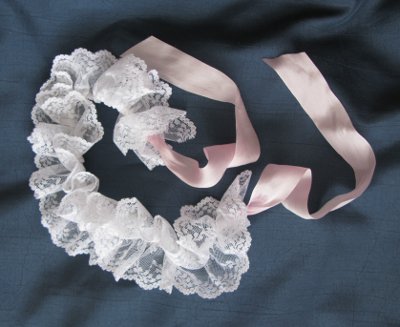
Neck ruffle, 2010
Decent looking lace can be hard to come by nowadays, but sometimes I've been lucky to find some that will do. This one has a nice pattern and is very soft, so I turned it into a nek ruffle. This deliciously pretty little piece is tied at the back with a silk bow - this time it's even real silk.
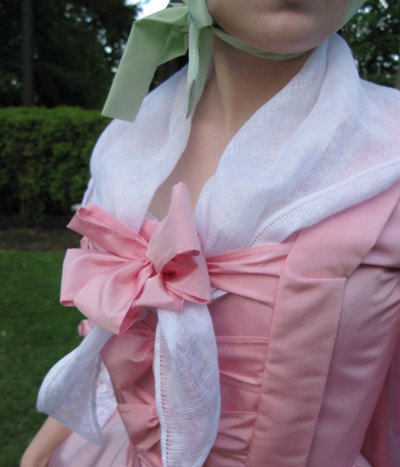
Neckerchief or scarf,
2009
It's a good idea to cover your snow white bosom at daytime, not only for decency's sake but also for sun protection.
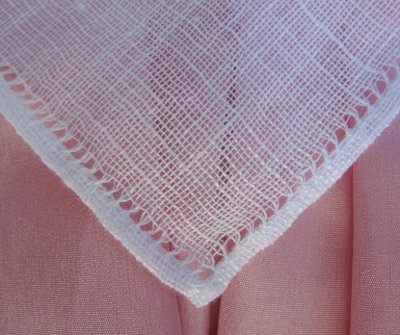
This simple linen kerchief is a triangle hemmed by hand. The diagonal edge has a is a basic hemming, the straight edges a fancier one with a couple of threads removed. It was about time I found some use for that particular page on my school book!
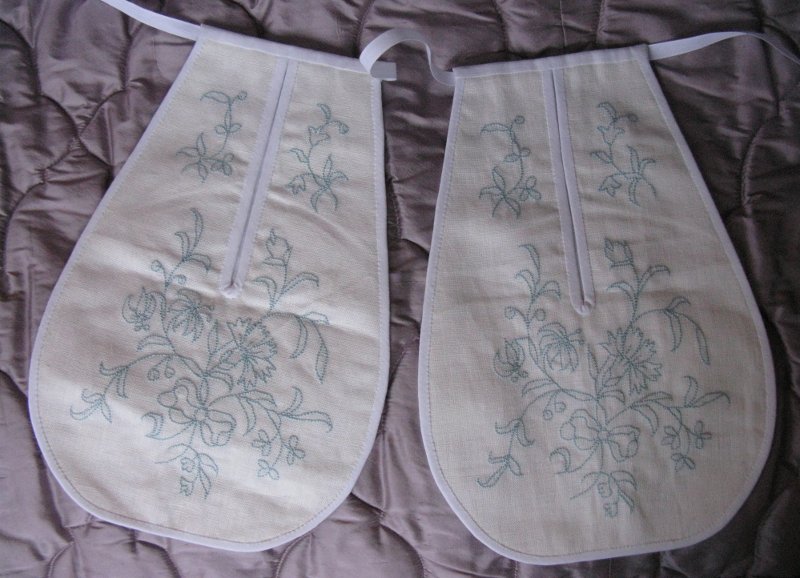
A
pair of pockets, 2009
Hanging pockets were flat pouches tied around the waist, worn over underpetticoats and under the gown. The top of the side seams of dress was left open so that one could access the pocket. They are quite indispensable, and in this century a convenient hideaway for cosmetics in plastic packaging and cell phone.
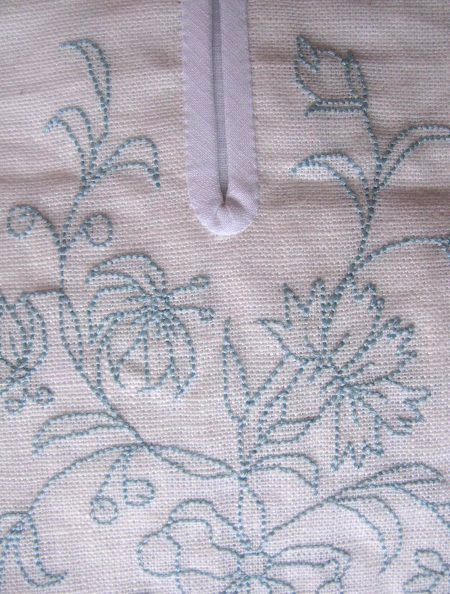
This functional, usually invisible accessory was nevertheless often elaborately embroidered, perhaps because embroidery was a popular hobby among upper classes. I thought that I could perhaps just hope to ever finish some simple piece of embroidery of this scale - embroidered gowns I leave for those more into needlework! Searching for inspiration I found this period pocket from Victoria & Albert Museum. The backstitch pattern is both lovely and easy, in other words perfect.
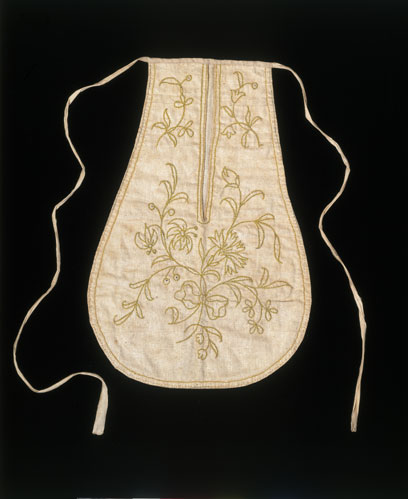
For the material I chose white linen. The thread I used is basic modern DMC embroidery floss, I was too lazy to hunt for silk floss and just aren't that strict about period materials. For the color I chose a lovely aquamarine.
I enlarged the picture, printed it and copied it into my fabric with a pencil. The backstitch embroidery on linen was so easy and relaxing that it could well be used as therapy. The best part of it I finished in bus and at coffee breaks at work.
My linen material was not very densely woven, which was nice when working on the embroidery, but needed a lining in another, thinner half-linen material. The lining also protects the underside of the embroidery from chafing. I edged the pockets in (unorthodoxically bias cut)
strips of the lining material. I can't help it, I'm simply obsessed about the lovely neatness of bias cut edging even though I know it's not period. It won't make up for the bias cut, but apart from a few hidden supporting stitchings the pockets are constructed entirely by hand.
A
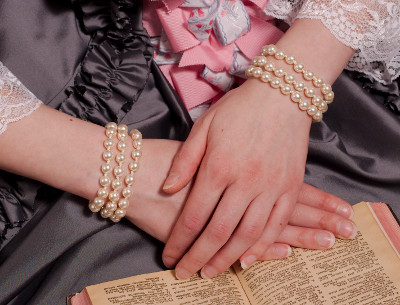
pair or bracelets, 2015
You can see this kind of bracelets with several rows of pearls in many period portraits. My friend Riikka who knows all there is to know about beadwork helped me to make these.
Four seems to be the usual number of rown but as the clasp I found had loops for three rows I went with that.
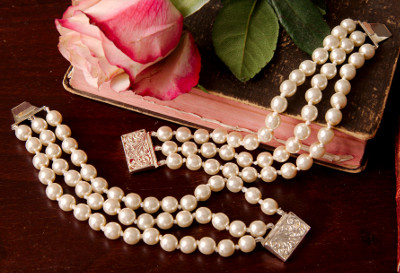
The pearls are fake plastic ones, but as this was my first attempt I did not want to put too much cash on it. At least they are knotted by hand with silk thread. I'm used to sewing so it was fun to make something that was finished in a few hours.
The bracelets look nice with a francaise, and might work for some vintage / modern evening look too.
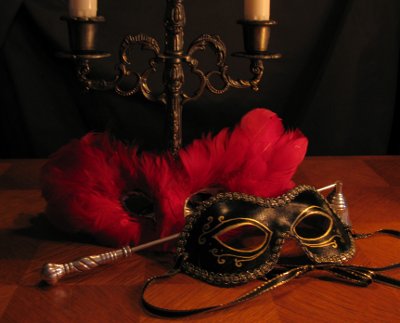
Masks, 2009
Le Bal Masqué at Viapori fortress inspired me to dig up a fancy feather-trimmed mask I had made back in school. It's made of newspaper sheets and glue on a previously formed claybase. It had been left slightly unfinished, so I added some more feathers (I still had the rest of the bag) and ribbons for tying it. Unfortunately the mask had been originally intended more for decoration than wear, so the shaping did not correspond very well with my face, and I had to pull it upwards all the time. I really should have put a handle in it rather than the ribbons, but I imagined I could live with it.
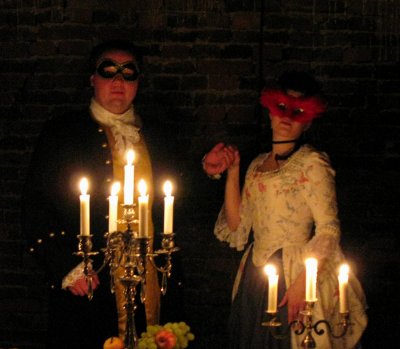
Jarno's mask is, due to the lack of time (which went into finishing his coat) and laziness simply a batman-styled mask that cost like 2 euros, which I decorated very fast with gold marker and some fancy braid, and changed the elastic ribbon to a gold-edged one. It worked much better than my feather folly, though.
Anyway, the ball was lovely and we had very good time!
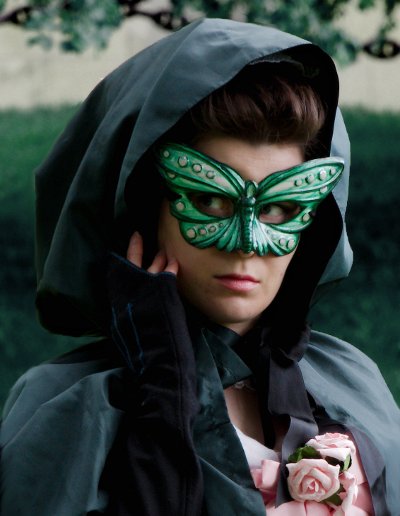
Mask,
2013
Another masked ball: I dressed in a pastoral costume loosely based on concept "Spring", basically this outfit with a (plastic) wreath of pink roses and greenery.
None of the masks I had really matched the outfit, except perhaps a basic simple one, but I found a very old plastic mask from my stash that might have potential. It was pretty loud and shiny, but a butterfly would go well with the spring theme.
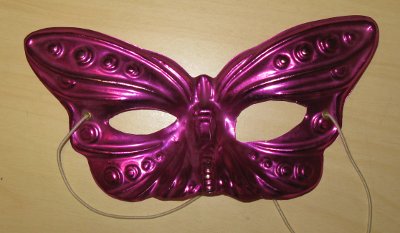
When wearing my previous masks I have found that small eye openings really limit your seeing, which can be very annoying, and larger ones also look nicer. For the first thing I re-shaped them to my liking (on the picture the other one is cut larger). I also cut the lower egde more detailed.
The plastic was broken at the nose bridge, so I reinforced it with fabric tape on the other side.
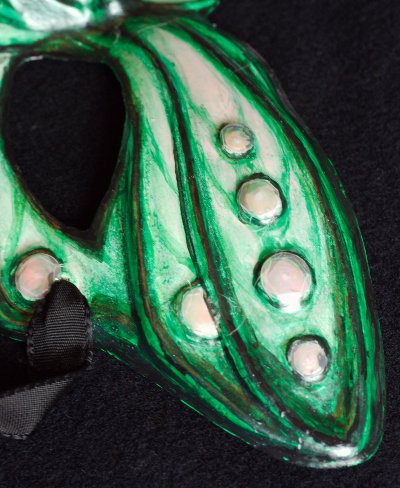
I bought acrylic paints in two shades of green, black, mother-of-pearl and light pink. On the price of 5 paint bottles I would, of course, have gotten a nice new mask, but as with all crafts, that is quite irrelevant.
At first it seemed like the paint wouldn't stay on the glossy surface, but with several thin layers the original surface was gradually disguised. I used the original mold as guideline for the pattern. My brushwork is not very sphisticated on a closer look, but I only get perfectionistic about sewing, so it doesn't bother me.
For the last thing I replaced the elastic band with ribbons and glued transparent spangles on the eyespots to catch light.
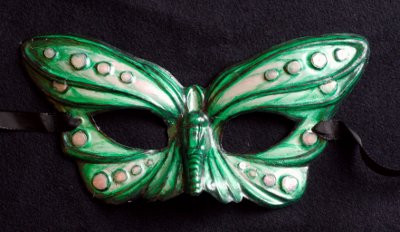
The mask turned out pretty nice, but in the end it did not go that well with my outfit - I think I went overboard with the cool bright metal green which looked off with the more neutral shades of the rest of my outfit. And, of course, real 18th century masks tended to be simple. The butterfly mask might go well for an absinthe fairy of some other fantasy costume.