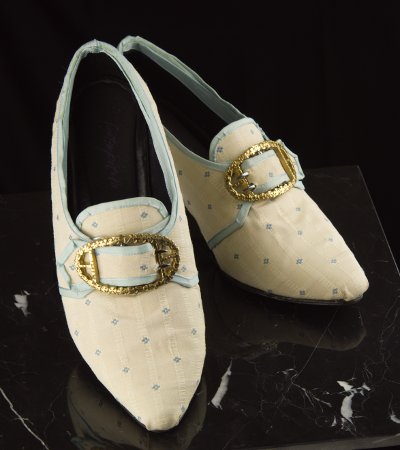
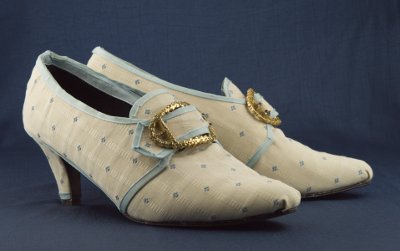
Shoes, 2011
Finding suitable shoes for historical outfits can be difficult or at least expensive. The cheap option is to transform a pair of modern shoes into something that looks remotely like period footwear.
Your Wardrobe Unlock'd has a great how-to article on the subject by Loren Dearborn. Encouraged by it I decided to try what I could do with a pair of pumps I bought on a charity store for about 9 euros.
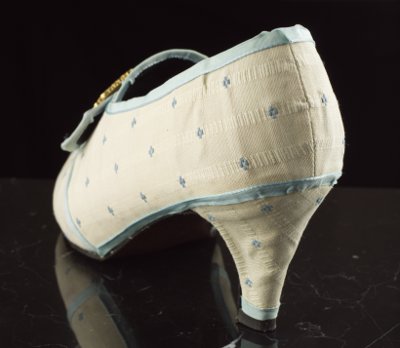
I wanted the shoes to go with many different outfits, so after some thought I decided the color scheme should be light and neutral, as I already have black period shoes. Lightly colored fabric shoes are not very practical, but these would only be worn indoors. The shoes had very narrow heel by 18th century standards, so I decided to date them to the last third of the century.
My fabric choice was a thick cream colored cotton with cute light blue dots woven into it. The subtle pattern would suit my chosen period and hopefully also distract the eye from the inevitable stains. As usual, only when I got to the cutting stage I realised how much matching I would have to do with a patterned material. Another thing that I had not anticipated was that the thick threads of the blue pattern on the wrong side showed through horribly when the fabric was glued down. Oh, well. This was an experimental pair anyway.
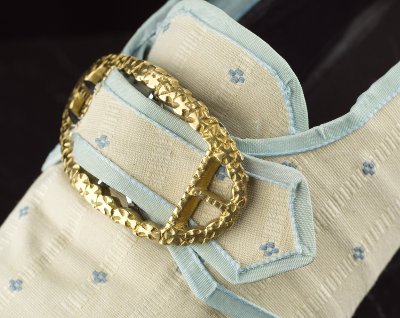
The edges are trimmed with taffeta ribbon. For all the gluing I used Tixo contact adhensive.
Covering the shoes went pretty much following the tutorial on abovementioned article. I planned rough patterns by draping muslin over the shoes and cut the pieces according to them with ample allowances.
I tore away the sole with the help of steam, which softened the glue. The tutorial tells you to remove the heel tip too, but when I couldn't move it anywhere I dediced it would be best to leave it, I would never get it as securely back anyway.
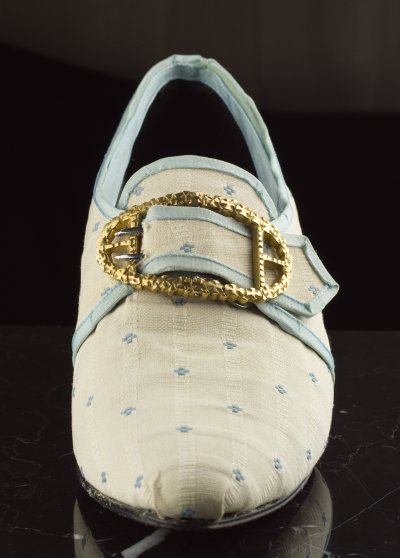
After covering the heels the toe followed. I glued a piece of fake leather on the underside of the flap to reinforce it and also to disguise the original shape of the shoe edge. As you can see, I had to pleat the fabric a bit on the pointed toe, which doesn't look very professional.
Next I glued the last piece which covered the back of the shoe and continued to form the buckle straps. The straps had to be edged with the satin ribbon first. Gluing the thin ribbon was rather messy, and some yellow glue stains can still be seen.
When the covering part was finished it was time to glue the sole back on. I used loads of glue just in case. I thought a bit over 60 kilograms would be enough for the weight to set the glue, so I put the shoes on for a moment after gluing.
For the last thing I finished the rest of the edging, added soft insoles for extra comfort and sprayed them with wet blocker. As you can see, the edging is far from perfect at some parts, but as I'm not on my most familiar ground with shoes (or glue!) I can live with that.
The buckles come from Jas. Townsend
Re-styling the shoes was a surprisingly rewarding project. The quality of the result is of course far from professional, but then again shoes don't usually get very close inspection and the half-period look is always more desirable than even the most elegant modern shoes. As I am used to working with needle and thread I was also happily surprised by how fast things can be done with glue.
The total cost for the shoes remained under 30 euros, so it doesn't matter so much if they are not as durable as proper well made shoes. And imagine the possibility of getting matching shoes for all your favorite dresses!