As I already mentioned, I
dated the suit loosely to mid-century. I had several
pattern sources, but none was of course nearly the right
size so I had to draft my own patterns and try to get them
look like the period ones. I based the coat on the
waistcoat pattern, which in turn was originally based on
the modern waistcoat pattern I drafted for Jarno back in
school. The coat pattern is really a combination of the
different cuts seen on different sources and my own
opinions and guesses about what might work best.
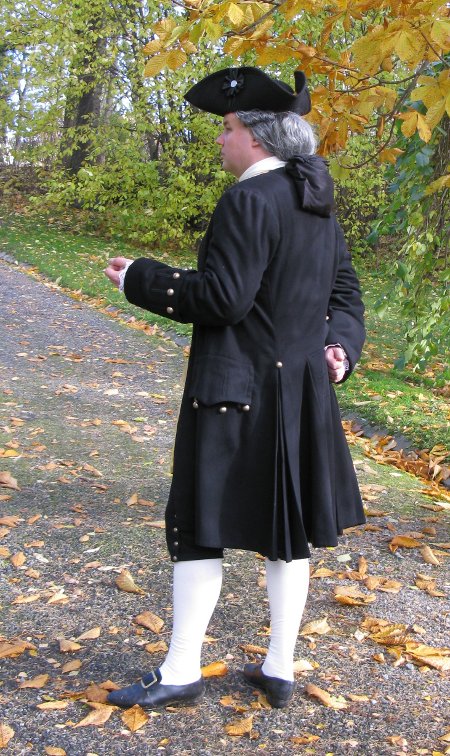
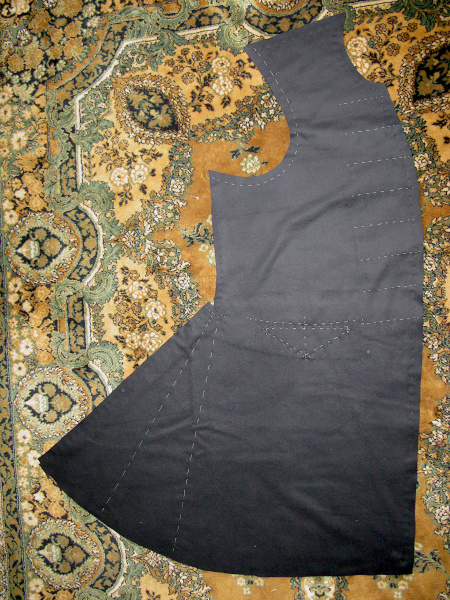
The front edges are slightly
curved, the collar that appeared later is still absent.
The lack of collar felt very odd at first but after some
time my eye got used to it. The skirts are still quite
full, the side slit has one 18cm deep pleat on the front
piece and two at the back piece. The total hem width is
close to five meters. While the hem is still cut wide,
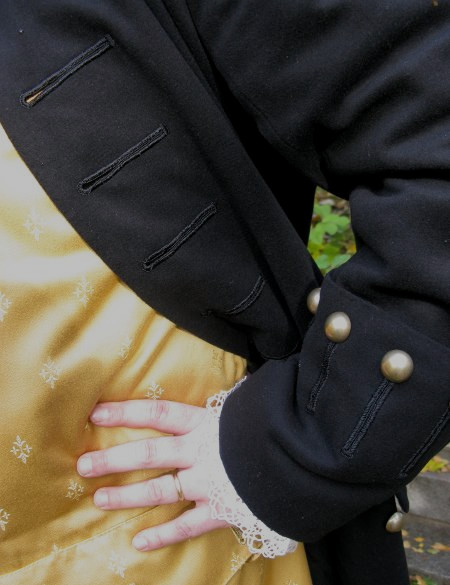
it's not stiffened anymore. The cuffs are also still quite
tall, but not as wide as in the 40's.
I had most difficulties in determining where the back and side slits should end and similarly the vertical placing of pockets. Pattern width is always relatively easy to check with fitting, but vertical details are much harder to scale when you are working with a pattern in very different size. At last I simply chose what looked okay - which usually works well, but with historical stuff can go horribly wrong unless you already have well-developed period-eye. Even before the issue of the slits I had spent ages trying to decide where exactly to place the side seams - because of the pleats the decicion would be final.
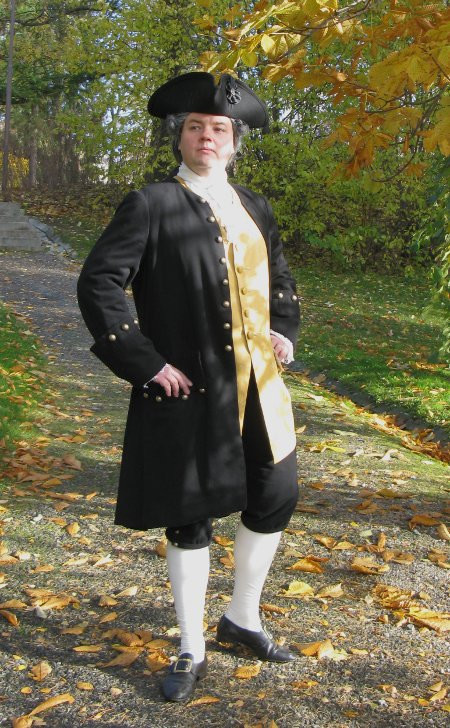
Another thing that puzzled me
greatlt was whether the coat should be wide enough to be
buttoned or not, though a fancy suit was usually worn with
the coat open. La
Couturiere Parisienne says it should be large enough
to be buttoned, but then again it seems to me that many
fashinable coats in the period paintings look rather
unlikely to button without strain. At last I ended up with
a compromise, not adding the allowance for the buttoning
but making it wide enough that it can for the most part be
just buttoned if needed. Again, it looks decent to me.
The most difficult part was,
not very surprisingly, the sleeves. As I have never made
patterns for anyone even close to Jarno's size the scale
alone made me completely lose my touch. 18th century
sleeves also seem to have mysteriously low sleeveheads,
partly because they didn't use any padding on the shoulder
(rather on the breast, which I decided Jarno didn't need).
Moreover, I never managed to quite form an idea of the
correct shoulder fit, even though I stared at the
portraits and costume films. I theory I also knew that the
sleeve should fit snugly at the arm, but on the other hand
I was afraid it would feel too tight for Jarno who is used
to looser fit - not to mention that he has to be able to
dance etc.
After some mock up-versions, however, I dediced to muster up my courage and put scissors to the real material. I cut most of it with regular allowances but left a wider allowance at the hem, since the wide hem would stretch differently in different parts anyway.
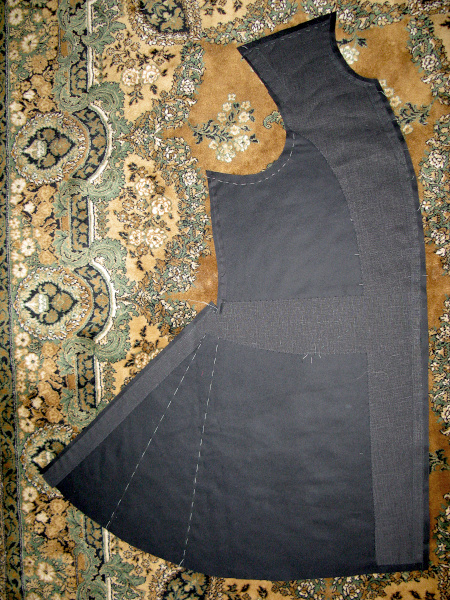
I this project I spend more
time than usually with the preparation work, marking the
pieces with basting and attaching the interlining by hand.
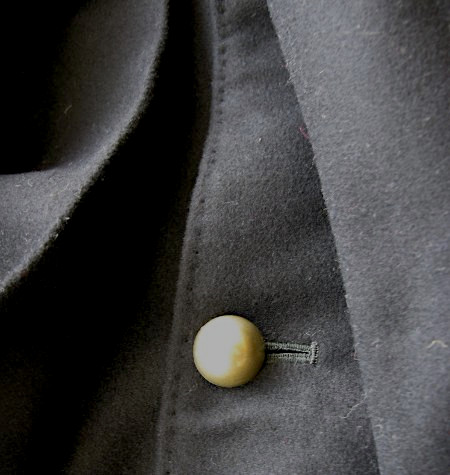
For the interlining I used stiff linen, black which is a
modern but also neat choise, as it just might peek
annoyingly out of buttonholes.
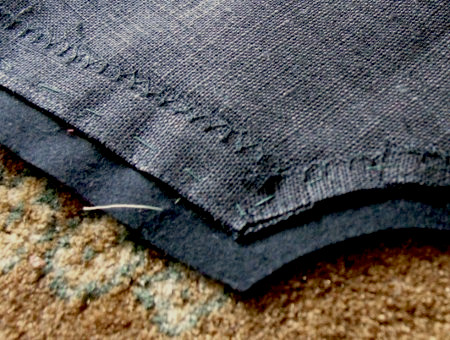
I put interlining on the front edges, neck and the shoulder of the front piece. I also reinforced it still by adding a narrow strip on the front edge and other places where the linen would be cut in the bias, thus liable to stretching. It's fastened to the interlining pieces with zig-zag.
I also used interlining in the edges of the side and back pleat, and all around the waist, the last one adding support also for the pockets and the top of the side slits. I also interlined all the places where there would be buttons, since though they were quite lightweight they might get caught somewhere. Of course, pocket flaps and cuffs got their interlining too - on the afterthought, I could have added another layer at least on the cuffs. Attaching the interlining was quite relaxing as the black fabric with a nap hid the stitches without much effort.
Apart from the usual matching points I marked the button/buttonhole places, pocket place and the side pleat folds and the end of the slits with basting.
For extra support for the seams I basted cotton tape on the vertical seams and the shoulder seam to prevent their stretching. This was especially needed on the center back seam, which was cut almost halfway between straight grain and true bias. I also reasoned that the tape might protect the woollen material from the possible chafing of the stitches, especially at the said center back seam which always has to endure some horizontal strain, so I basted it on both pieces. I also added tapes on the lower, curved part of the sleeve and elbows to prevent them from getting baggy.
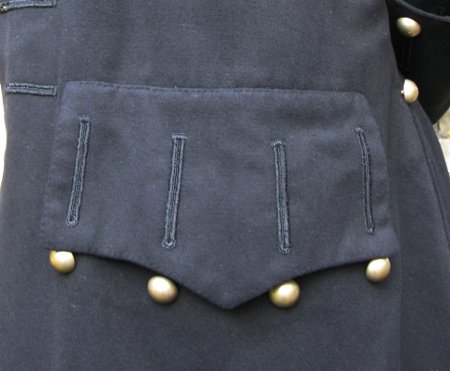
I had already some time before cut the pocket flaps and begun them, as I would need them almost at once when I'd begin sewing the coat, and it would be frustrating to begin then with the buttonholes, 8cm long and four of them in each flap. I had originally planned to use silk thread for them, but as it would have taken forever I bought more of the shiny viscose thread I had used for the waistcoat too. It got tangled very easily, but as it was thicker it speedied up the work which was very welcome.
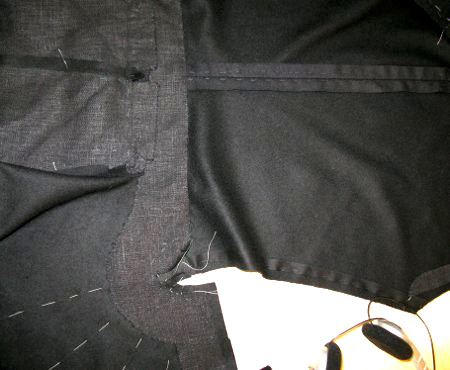
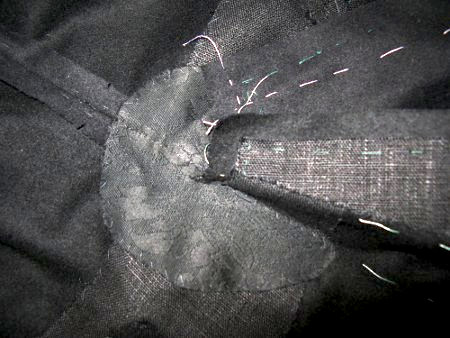
The next thing was the first real seam, the back seam. Only after closing the seam I attached the horizontal interlining band over it. Then I added the back inserts, which was rather exciting in the very tight corner in the flared back piece (the fold caused by this can be seen on the picture). I backed the corned with a piece of linen. After adding the back inserts forming the back slit, I fixed the top of their interlining, which extended over the seam and was fixed on the horizontal band in the waist. I reasoned all this would protect the seams against the weight of the skirts, and also the strain if they were caught for example when sitting. Despite being relatively thin and slightly shiny the woollen fabric disguised all the supporting layers which were rather thick at some places.
Having now both front- and back pieces ready it was the time to put the side seams together. As I was completely obsessed by the thought of the strain the heavy pleats would put on the seam, I wanted an even stronger interlining for the top of the side slits (as is also advised in period manuals). Having closed the seam I added a rounded piece of very thick canvas.
Then I closed the shoulder seams and made up the sleeves.
I added some light wadding on the sleeve head, like I
might do in a modern coat to help to disguise the thick
seam allowance. Then I folded and pinned the side pleats,
and it was the time for the first fitting.
On the fitting the coat
looked pretty good, apart from the sleeve which still
didn't quite work. At this point I decided it would do,
however.
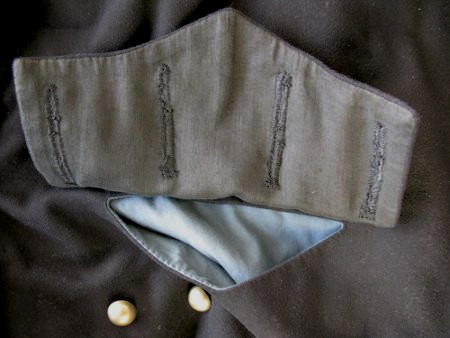
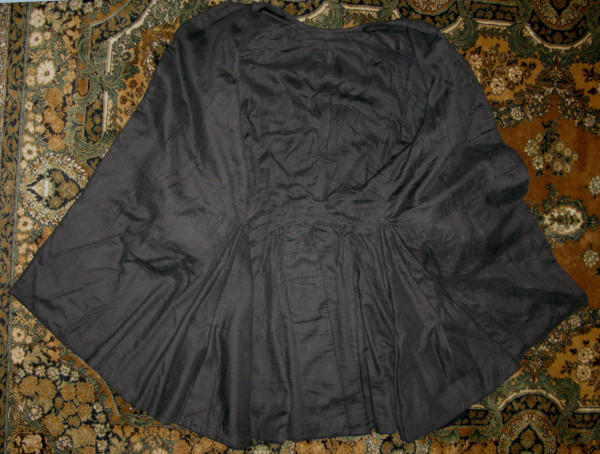
It was the time to make the lining. I used the same thin black linen as is the waiscoat. Even though I'm aware that period linings were usually light, I couldn't get past my obsession of black lining for a black coat. Thin white linen would also have been too transparent with black, and silk was out of the question for budget reasons.
Cutting the lining was a pain, since I had prewashed the linen to prevent further shinkage, and while drying it had obviously stretched somewhat at some places. Thus the edges weren't running straight anymore. Having finally managed to cut it and made it up I sew it on the front edges from the waistline upwards. I also attached it at the top of the side pleats, and not knowing the correct method I just made it as it felt convenient. Then I put the coat on my dummy and let it hang there for some days so that the wool and the lining would both stretch as much as they eventually would before I put them together.
Making two different bias-cut
materials to co-operate turned out not so easy. I pinned,
basted and ironed again and again but every time there was
bagging somewhere or the edge turned inside. I think the
lining was really off the grain at some places when I cut
it, since the other slit was slightly better than the
other. I also think that the top fabric's slit edges may
have stretched a bit before I put on the interlining, what
I should have done would have been to check the lenght
from the pattern when cutting the interlining band. The
front edges also caused similar problems though on a
smaller scale.
I spent some time raging and
cursing and deciding I would never again touch anything
bias cut ever, but at last I managed to get the lining
work somewhat decently. Unfortunately I didn't have very
wide seam allowances but I worked with what I had. The
result is that in some parts the lining begins more than
0,5cm from the edge, but as it's black it doesn't really
show.
So, at last I could baste the hem and cut it even. After the fitting I was extremely reluctant to undo my basting, turn the coat over and try to get the lining match, no matter how many matching points I might have cut. Instead I chose the period method of folding the edges under and finishing the hem by hand, which I really should have done with the front edges too. From the waistcoat I had already learned that a modern vertical allowance in the lining definitely does not work. Anyway, the sewing went amazingly fast, and I'm rather confident that machine made bag lining would have needed so much adjusting and possibly redoing that it might not have been significantly speedier. I also figured out almost by accident how to do "Le point a rabattre sous la main", which had sounded difficult in theory but at least on a soft and not very thick material was dead easy. It means to sew the folded edge of the lining about 1-2mm from the edge so that your stitches go partly through the edge to the right side, so that the result is like a neat bag lined edge with supportive hand stitching all at once. Brilliant.
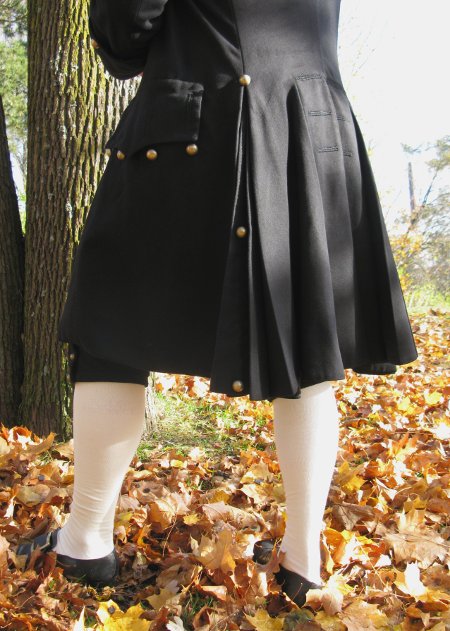
When I pressed the suit before shooting I forgot to button the side vent, as can be seen on this picture!
I had put off the troublesome
sleeve as long as I possibly could, but now was the time
to confront it. With the cuff I had chosen a shamefully
modern method of sewing the cuff and the turning allowance
together with the lining and leaving the lining to fold a
bit. Then I had put the sleeves on, machining them and
all, but they just kept hurting my eye. To be more
precise, my interpretation of the 18th century sleeve as
seen on the original patterns, with low sleevehead and
markedly shaped elbow just didn't seem to work for Jarno.
With hindsight I think the sleeve might have worked
slightly better had it been tighter at the arm, but like I
mentioned, I wanted Jarno to be comfortable in it. Anyway,
at last I decided I couldn't live with them, and took them
off and began anew from the scratch.
From my pattern sources the
one of The
Olde
Militia
of
Helsinki seemed the most simple and likely to fit -
perhaps because as it is meant for more practical military
wear. At this point I had decided to forget all things
period and make the sleeves however modern if I could only
get them to look decent by any standards, though. So, I
took a new aproach, trying to draft a more modernly shaped
sleeve that would fit Jarno. I drew the sleevehead
considerably taller and finally took out much of the curve
on the elbow. Luckily I still had plenty of material (as I
usually buy too much) to redo the sleeves completely.
Luckily also the cuffs fit the new sleeves.
After the battle of the
sleeves I still had buttonholes and some more finishing
touches to do. Having begun the coat on my summer vacation
(on August), I had spent so much time with it (or avoiding
it) that the Christmas ball was approaching fast at this
point. Which was a good thing, otherways it would have
probably taken a much more time to finish this project.
The last days before the ball I spent with the
buttonholes, also pressing the side pleats a bit more and
finishing our masks. The side pleats were still
troublesome, and I had to press them yet again and change
them slightly. I also fastened some of them with a few
stitches. With hindsight it might have been better not to
mark the pleats on the pattern but rather experiment where
they would naturally fall, but then again I might also
have gone insane trying to get them even then.
The side slits also got
smaller buttons and buttonholes (which I made with silk
thread this time, as they were smaller). The real purpose
of the side slits is, by the way, that gentlemen could
carry a sword without it getting tangled awkwardly in the
skirts of the coat. At last I had to give up and leave the
last six buttonholes on the back slit to be added later,
as they are kind of optional. It took another several
months to get them finally done again!
So, Jarno got his suit for
the Christmas ball, but it took almost a year before we
finally got around taking decent pictures of it - we have
already learned that events are not the best oppurtunity
for shooting, since you are often in a hurry and lack the
mood to really concentrate on taking a lot of pictures. On
the other hand, this procrastination gives a chance to
judge how the suit has worked in use.
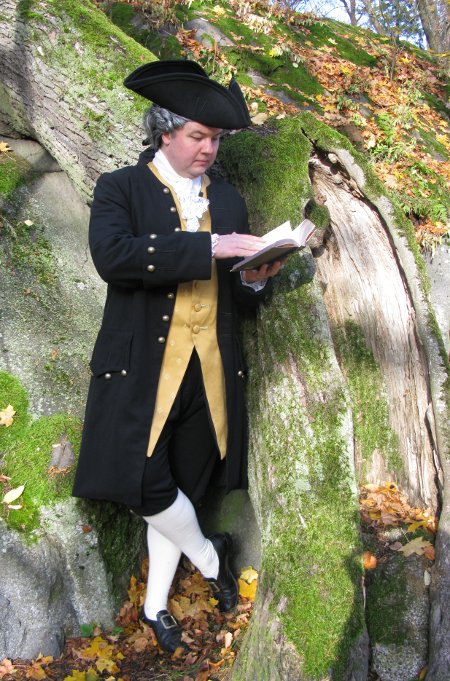
From my material choices the linen seems to cling to other clothes very easily, but as linen has been used for lining I think this must be somewhat inevitable - it might be about the quality of linen too, though. The inexpensive linen I used also shows some signs of wear on the underarms already, so I may have to patch it up in the future. The wool has lasted well this far (and I hope it continues to do so), but is so soft that it might have needed more or heavier interlining at some places, especially the cuffs. The neck has also strecthed in use, not very surprisingly as the coat hangs open and the wide skirts are quite heavy. You can see this in the pictures as the shoulder line is falling downwards, though it might also happen easily because the coat is worn open. Like I mentioned with the breeches, my interlining choise for them was a total fiasco, and besides that the soft wool has also stretched quite a bit, not only at the waist but also at knees. Heavier and stiffer wool might hold its shape better, but then again it would be way too warm to be used indoors - poor Jarno is already sweating after dancing as it is.
I'm still not 100% satisfied
with the sleeves, they work so and so but are a bit too
modern. I think part of the problems I had with the
sleeves comes simply from the shape of Jarno's shoulders,
as he has a very straight shoulder line, not stooping at
all like was the period fashion. Some of his modern
clothes fit a bit awkwardly too and I have for a long time
tried to figure out why. When I made my own riding habit
later, the low period shoulder line and sleeve, which came
almost straight from a reference pattern, fit me quite
well with only minor adjustments.
The side slits have also been
troublesome, but now I think I have finally gotten them to
settle down after pressing them yet again, changing the
line of the outer one once again. I should originally have
followed more where the folds would naturally settle than
to just stare blindly at my neat pattern.
After finishing this suit I felt I would never, ever attempt the same again, but now, after some time has passed I occasionally find myself thinking that Jarno might get another one some day. Not very soon though! I will have a lot to experiment and improve yet, which is of course also part of the fun of dressmaking.
<<Back to the Project page
More about the waistcoat
More about the shirt
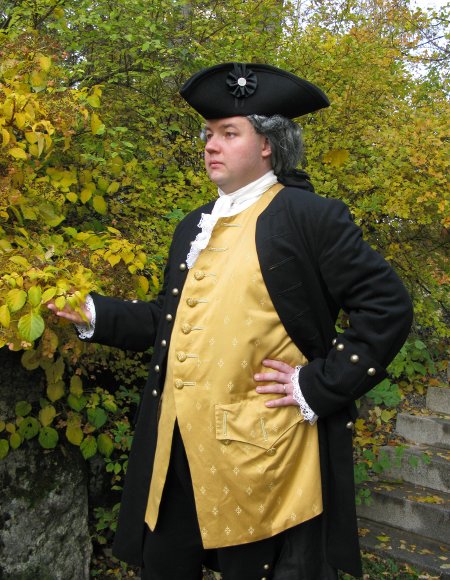
The tricorn and the shoebuckles are from
Jas. Townsend & Son, Inc
The wig is from a local carnival shop, I painted it grey and added the bag.