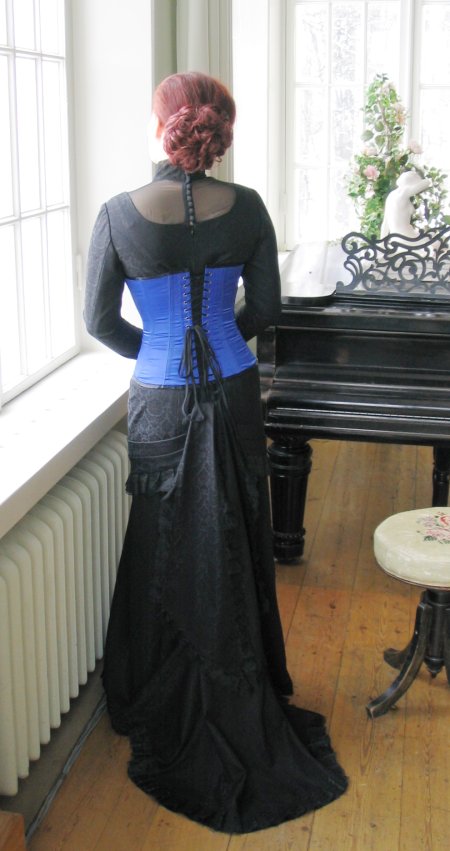
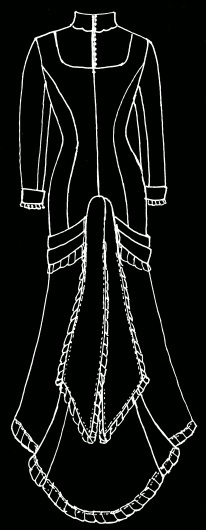
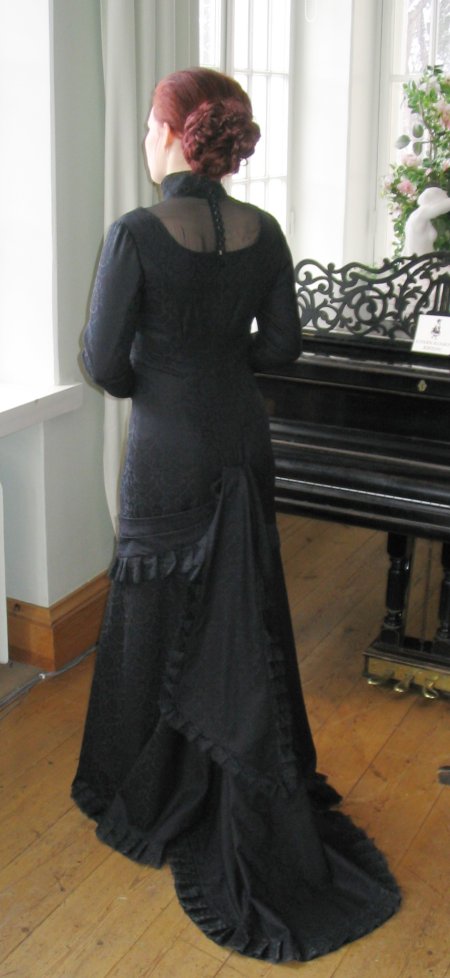
The skirt piece below the horizontal seam at
mid-thigh is simply flared. The mock up for the back pieces
forming a short train I cut randomly, having some rough idea
how they were supposed to be shaped, and tried them on on a
dummy. Here again I didn't go so much for a historical
accuracy but more for my own idea of what it was supposed to
look like. Of course the result is plainer than the
period fashion plates for the fact that there are no ruffled
petticoats underneath alone. The horizontal seam is neatly
covered with a pleated thingie, for which a pattern was
created with copy-paste method. It's a separate one,
attached only on the center back seam and with thread loops
on the side seams. In hopes of having it cling body and fold
prettily it's cut on bias, which I though beforehand to be
easier than it proved to be - as I was making it, the pieces
tended to pull in different directions.
|
 |
The same proved to be true of the
chiffon. I wonder how I could have forgotten my experiences
with chiffon with the knit
dress just before, and actually voluntarily go near
the fickle thing again.
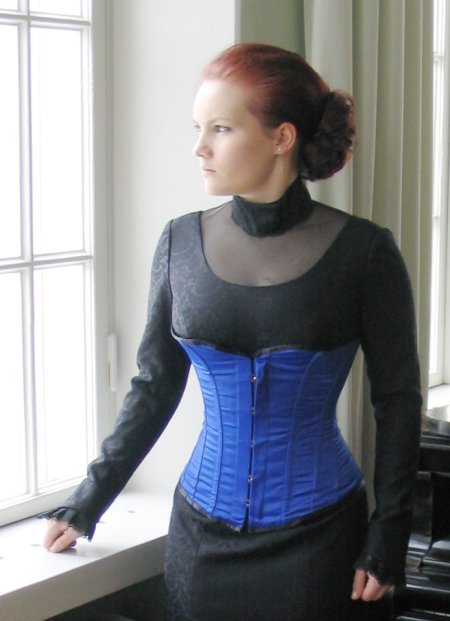
There is nothing revolutionary to report about the
construction of the dress apart from the neckline and the
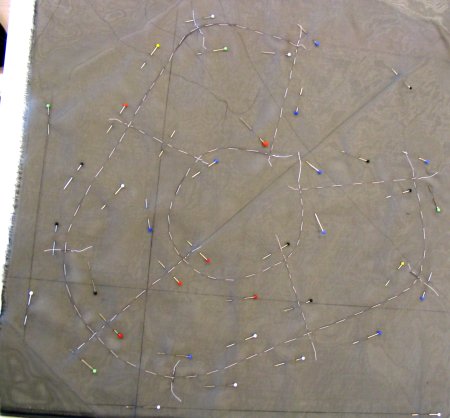
train, really. As you can see from the pictures, I marked
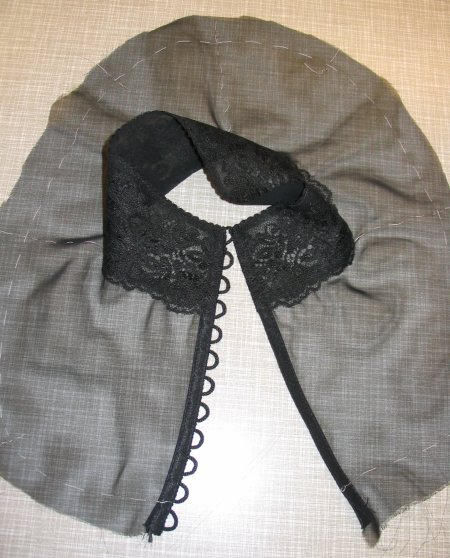
and cut the chiffon quite carefully. The standing
collar was a piece of wide lace lined with chiffon. Being
thus a straight piece it did not fit as well as a curved
collar might have, but I wanted it to stay a bit transparent
so I did not want darts or seams in it.
There was a machine in school with which you could cover
buttons with fabric fast and easy and cheap, so I got a
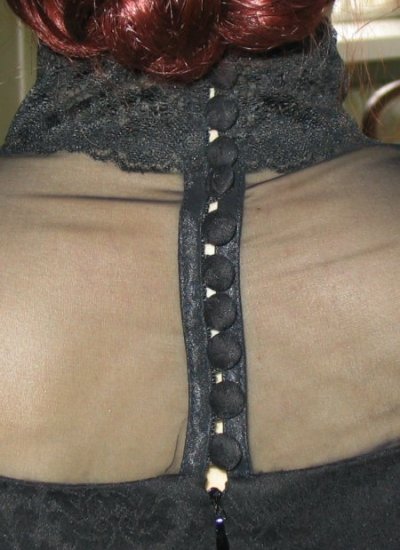
pretty row of buttons at the neck. The back opening is
finished with looped band for buttons and narrow bias tape. |
 |
| I had spent considerable time
and effort in fitting the chiffon neckline, but still
it was a terrifying experience to sew it between the
half-finished bodice and lining. The the is, that you
can't really try it on until you have to cut the seam
allowances of such a curved seam very thin, and clip pieces
off here and there so that it will turn neatly over, and
thus say goodbye to unpicking it and doing it again very
easily, or at all even. I can still remember making it,
alone at school one evening. I did unpick and sew again a
few parts where the chiffon was crumbled between the seam
before the scary process of cutting away the seam
allowances. |
 |
Well, as you can see from the
pictures, it didn't came out quite perfect, the chiffon does
behave in a slightly wrinkly manner at some places, but then
again, had I tried to unpick and and do it again it would
probably have been ruined. Of course, now that I come to
think about it, I could instead have practiced a similar
thing beforehand... Anyway, as they say, when it's on and a
person won't stay still it will not show, right?
As you can also see from the picture, from the buttons down
its fastened by a very 21th century invisible zipper.
|
 |
Putting the train together was a much more
relaxing experience. The center back seam is closed down to
where the pleated vertical piece ends, and the long train
piece in the middle is folded between it, upper edge of it
being pleated, stitched down and covered neatly by the
shorter pieces hanging on the top. There are loops and
buttons hidden in the seams, so that the train can be pinned
up from the ground. I think something like 20 meters of lace
went into the pleating.
Apart from some minor faults the dress came out pretty much
like I planned, and on schedule, too. The good thing about
school projects is that if you became disheartened with them
you can't just bury them in the closet but have to think out
a solution for the problems and get on with it.
Kaisa has worn the dress at Lumous-festival and at
my wedding. Black may be a bit unconventional color for a
maid-of-honour, but actually many guests complimented the
stylish effect created by a bride in white, maid-of-honour
in black, and the groom and best man in white ties.
<<Back to the project
page
|
 |