18th century hats
To complete my outfits I have made a few adventures into the world of millinery. I know practically nothing about it, but that is actually what makes it fun, as I can just experiment and fool around without being too perfectionistic about the result. My hat projects have thus generally been both interesting and relaxing affairs.
Straw hats were popular at the period and a good way to protect snow white skin on an age before sun protection lotions.
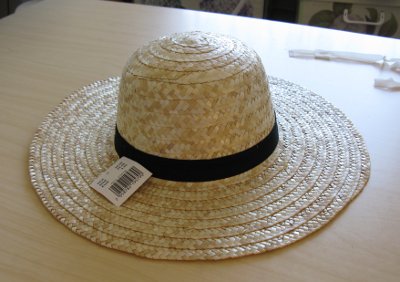
Correctly shaped straw hats can be ordered from several places, but for my first attempts I have used hats purchased in Plantagen. They cost a bit under 4 euros which encourages a bit of extra effort and experimenting.
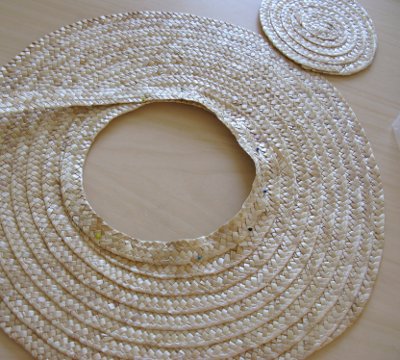
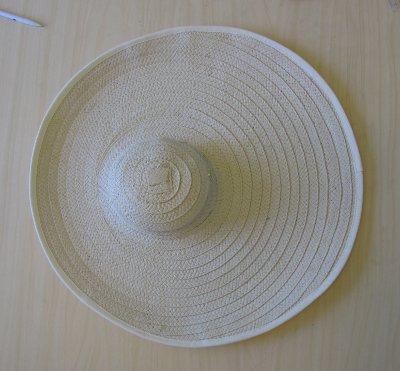
The hat I've used is made of a bit over 1cm wide straw sewn to shape on chain stitch, so it's very easy to take apart. I have opened the hat at the base of the crown and taken off the extra layers of straw until the crown left is of the desired size. Straw can also be molded with steam iron, so I have pressed the crown flat. I have also pressed the removed straw to the desired shape and sewn some of it on the brim to make it match the new smaller crown. Sewing the sides of the crown is more tricky, I have first sewn one or two tiers of straw on the sides of the crown and one to rise from the brim, and then stitched these together.
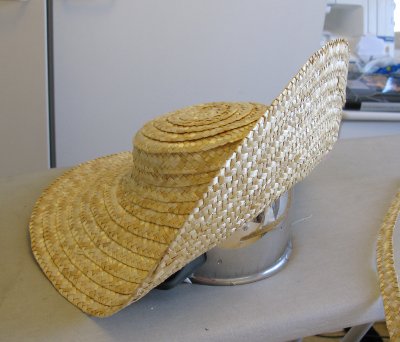
Sewing straw goes fairly easy with industrial sewing machine, and the joining of the brim and crown which will be the most messy part and may require a few attempts will be covered with a ribbon anyway. To be honest I must confess that my first attempt on making a straw hat ended up in a trash bin, but subsequent ones have had better success.
The Plantagen hat base I've used is fairly stiff, so it's more suitable for sturdy (and durable) than soft, elegantly drooping hats. The brim can be shaped to some extent with steaming, and inserting a metal wire on the brim edge might offer more opportunities for shaping. On a closer look the straw is a bit heavy and not as fine as in fancy period hats, but it's a good, inexpensive option if you are not overly ambitious. For a fabric covered hat it would be perfect.
2009
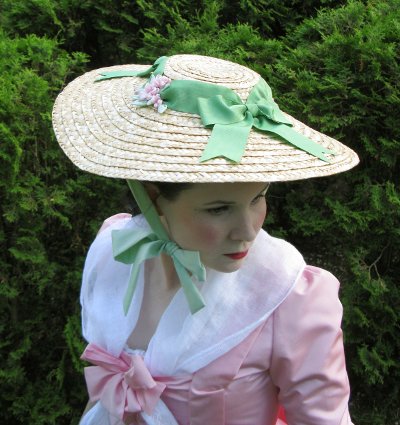
I made my first straw hat to match my pink Pet en l'air. The model dates to the mid century with a small crown. It could be even smaller, though. I remade the crown as explained above and added a few extra rows of straw on the brim edge to make it wide enough.
The cheap hat base is decorated with a real moiré silk ribbon found in Stockholm. It made so pretty bows that I wanted two large ones on the hat. Unfortunately the moiré pattern dissappeared with the first summer rain.
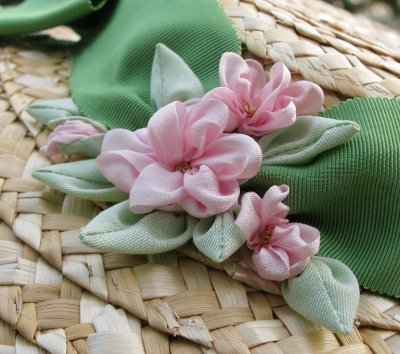
To make the hat match the dress I added pink flowers between the bows. The flowers are made of silk ribbon, the leaves (and also the ribbons for tying the hat) come from Jarno's shirt, which I once ruined by trying to take some extra off from the side seams in a hurry, which ended in my overlock machine cutting a giant hole on the front. Well, at least the poor shirt got some use in the end.

2011
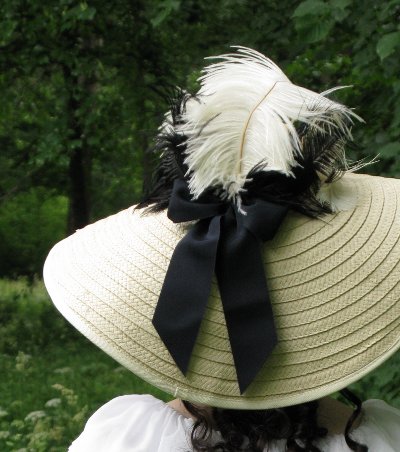
The hat number two in my 18th century millinery career was designed to cheer up my first period dress, the printed Robe a la Anglaise. Like the dress it'd roughly dated to the 1770's, and my vision was to get a fancy feathered pique nique hat.
The color scheme was of course a tricolor one according to the dress. As bright red tends to take the attention from everything else I used it sparingly and chose pink for the flowers instead.
I added a few tiers of straw on the back of the brim and shaped it with steam to turn a bit upwards. The taffeta ribbons were sewn into the hat on an early stage to help with the shaping.
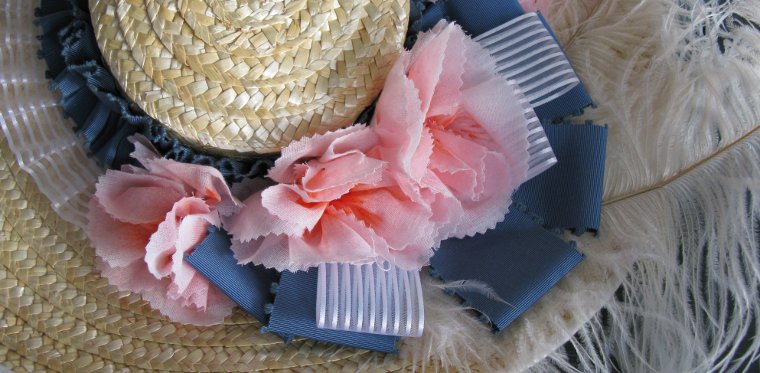
The flowers are made of the remains of the muslin curtains that went into the Chemise a la Reine, and they are painted with fabric paint and half dried red permanent marker. I cut oval pieces and gathered several together to form flowers. Paint stiffened the sheer material nicely, and the pinked edges have lasted without fraying these at least for the few wears the hat has gotten.
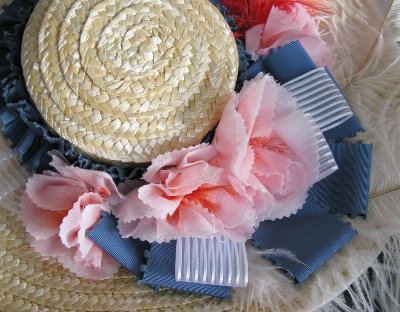
I pleated and sewed down the white ribbon with machine and gathered the blue ribbon on top by hand. I added some ribbon loops at the back of the hat, stuck the flowers on top, and for the last touch added the obligatory fluffy ostrich feathers.
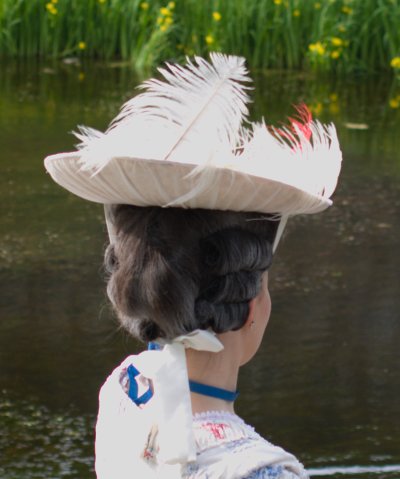
I finished the hat by sewing a wide strip of the same Reine muslin on the brim edge and pleating it inside the crown. This neatly covered all the stitches that had gone into sewing down the decorations on the top. The large stitches on sewing down the muslin are in turn covered with a ribbon glued on the top. The edge of the brim is finished with a bias tape in the same muslin.
The hat turned out very cute, and like I had hoped it added a new, elegant touch to my dear polonaise.
2012
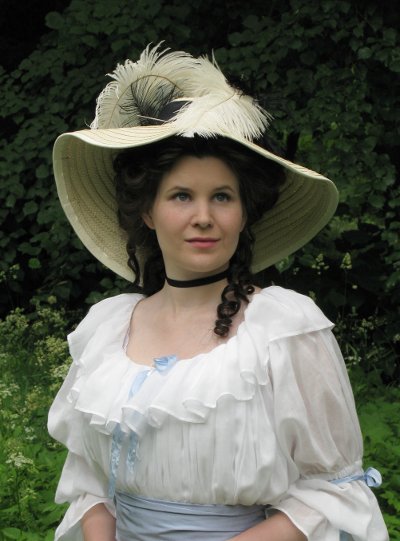
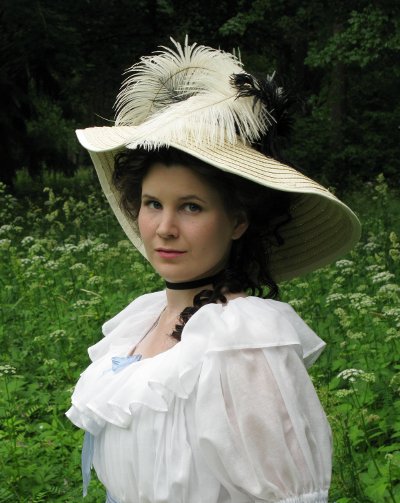
Chemise a la Reine needed a hat of it's own, which I was inspired to make the next summer.
My main inspiration was one of the lovely hats in the Duchess-movie. Pictures of it can be found at The Costumer's Guide to Movie Costumes.
As the site points out, the vast straw hat in the movie seems even to be based on a period painting.
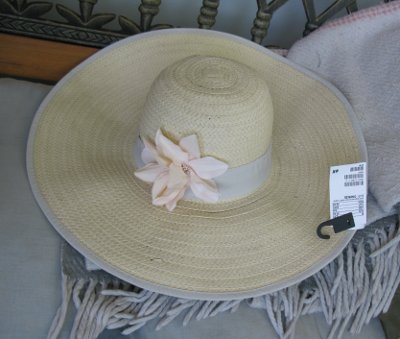
For my base I chose this time this sun hat from Hennes & Mauritz. It's made os "paper straw" and is softer than the Plantagen one I usually use, and thus more suitable to a gently sloped hat. In fact the brim was at first so droopy that I thought of edging it with metal wire to shape better.
As usual, I began with taking the crown apart and making a new smaller one. This one was small but just a bit higher than my previous ones. I also moved the crown a bit towards the front edge. Then I sewed all the leftover straw on the back side of the brim. I did not have quite enough straw, however, to make the back brim as wide as in the movie hat.
I made the hat in a hurry, and the final shape is far from regular. The ends of the extra straw tiers at the sides are also finished not so neatly. But as I've said, I'm not nearly as perfectionistic about my hats as I am about my garments, so they will do. I did, however, change the black brim edge binding in the movie hat to a cream one which would not call attention to the irregularly shaped brim so badly.
When I had re-sewn the hat into the right shape I was happily surprised to discover that it naturally fell more into the desired shape in my head too, and thus there was no need for metal wire.
And then it was time for the yummy part, decoration! The movie hat sported some super fluffy and beautifully droopy ostrich feathers mounted on the front side of the crown. I chose to improvise a bit by attaching them to the back of the crown instead. The feathers I had were annoyingly upright, however, and I wondered a bit what to do with them. Happily I realized that as feathers are more or less made of the same stuff as hair they can surely be coaxed into co-operation with some heat. An old curing iron did indeed turn them into softly drooping feathers, and if they spring back with time I can always give them same treatment again.
In addition to the white ostrich feathers Georgiana had some random looking sharp black feathers on the side of her hat. I happened to have smaller black ostrich feathers so I decided to use them instead.
As another addition of my own I added a very dark blue ribbon around the crown and tied it on a big bow on the back. Along with the black feathers it brings some refreshing contrast to the light toned hat, especially with a white dress.
As the hat has small crown and no ribbon ties it needed some extra fastening to stay neatly atop my curls the whole day. I used an old knitting needle as a hat pin as I didn't have anything more appropriate at hand. Later I happily found a proper hat pin.
Even though I planned the hat originally for Chemise á la Reine it could well be used with other late 18th century outfits I may some say make, especially as I learned to make a decent hedgehog hair too.
2010
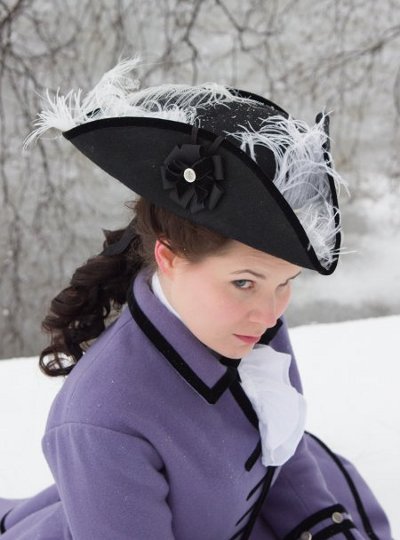
My new riding habit of course needed a masculine tricorn. Due to a busy schedual (once again) I didn't have time to order a really good one, so at last I resorted to buy a cheap fancy dress one which at the first sight looked pretty tacky. Luckily it was at least made of some kind of felt (although very low quality), but there was a not very neatly glued gold braid around the brim.
Some patient treating with steam iron help to get rid of the braid and also most of the glue marks. I had a just long enough piece of velvet ribbon left from the habit which became a new brim edging, covering most of the remaining glue marks.
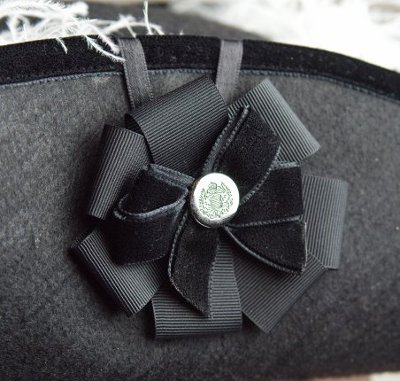
I punched holes to the brim and crown to tie the sides of the brim up with ribbons. I also made a cute little cockade and for the last touch added the ostrich feathers. They bring the much needed touch of lightness to the black hat.
The hat is men's size and thus a bit large for me, but with big enough hair it goes well enough. The decorations take the attention out of the modest quality of the hat itself. The good thing about it is that for a cheap one it feels at least sturdy and durable. I really like the tricorn and apart from period wear I have also used it as fancy dress wear.
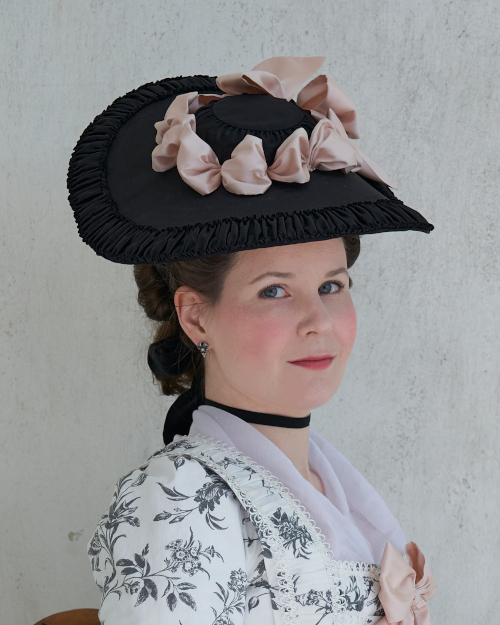
2022
I had for some time dreamed of a black bergere, and when I made a printed cotton Robe a la Francaise I decided it needed one. The hat base is once again a reshaped straw hat, which I covered in black dupioni and decorated with pale pink.
This hat project was a bit more complicated than my previous ones, so I decided to make it a project page of it's own, where you can see more pictures and making-off details.