The most important part of 18th century underwear are of course the stays. But apart from them, a girl also needs so many other linen pieces and skirt supports...
Shift / Chemise, 2008
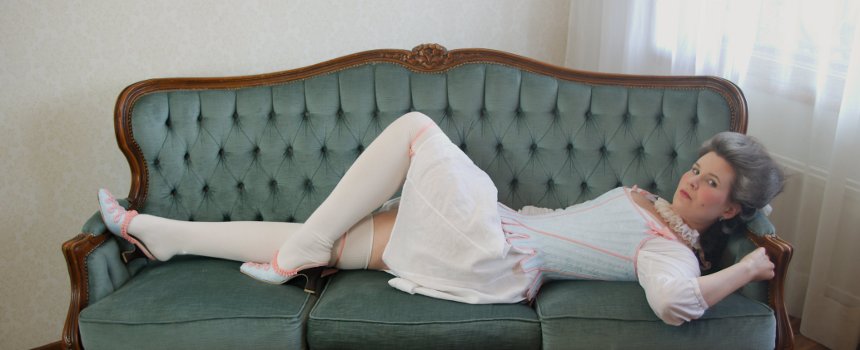
Underneath the stays is worn a knee-length shift (aka chemise). For my first one I chose a fine cotton batiste for the material. Linen would have been the more probable choice when considering accuracy, but cotton was used too, though it was often more expensive. My reason for choosing this is that I love the softness of this particular fabric, which I have used before on other garments.
The basic pattern is from the tutorial of La Couturiere Parisienne.
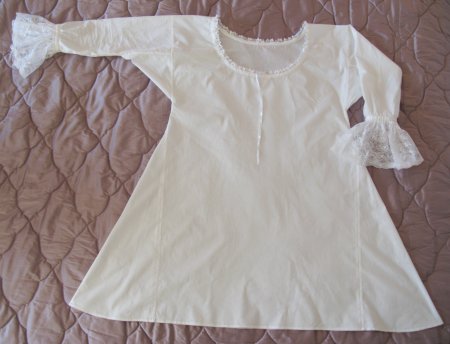
The shift is constructed mostly with french seams, the underarm gussets are inserted with flat felled seams. There is no machine stitching visible in the outside, but I didn't have enough patience at this point to make as much of the work by hand as with a shirt for Jarno which I did later.
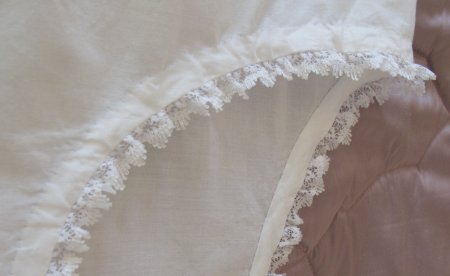
The neckline is turned with a bias-cut strip of the same material, with a narrow lace attached in the seam. Not terribly period, I'm afraid, but neat and handy. The lace in the elbow ruffs is quite modern too, but I may replace it if I'll come across a better one. The ruffles are gathered into a band which is basted to the armband of the chemise.
On the first sight the pattern seemed very wide, but as the material is thin it works very well.
The shift is constructed mostly with french seams, the underarm gussets are inserted with flat felled seams. There is no machine stitching visible in the outside, but I didn't have enough patience at this point to make as much of the work by hand as with a shirt for Jarno which I did later.
The neckline is turned with a bias-cut strip of the same material, with a narrow lace attached in the seam. Not terribly period, I'm afraid, but neat and handy. The lace in the elbow ruffs is quite modern too, but I may replace it if I'll come across a better one. The ruffles are gathered into a band which is basted to the armband of the chemise.
On the first sight the pattern seemed very wide, but as the material is thin it works very well.
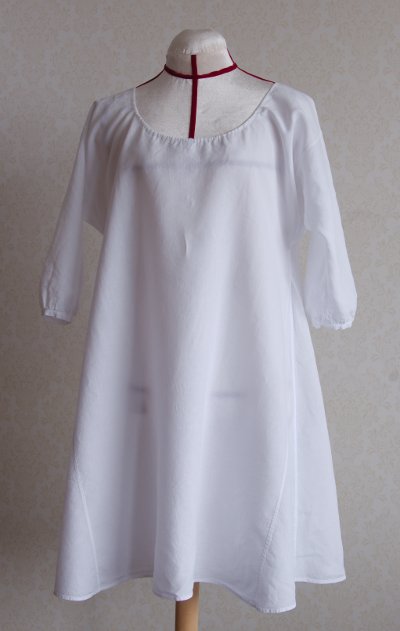
A fresh shift in sometimes needed, so one needs to have several. My second shift is made of fine linen. I needed one without lace to wear with more simple clothes. The lace cuffs in the first one are in theory removable, but the lace in the neckline is not.
With my first shift I learned that stays somehow pull it up a bit, and I have heard many, many jokes about my indecently short shift. The second one is a bit longer, though still very short by period standards.
This time I used hand-finished flat felled seams, as I got so enthusiastic about their neatness when making Jarno's shirts. The neckline is finished with a narrow hem though which a ribbon is threaded to pull it in.
The sleeves in my first shift were a bit too long, so I cut them shorter this time. They are gathered into a 1cm wide band.
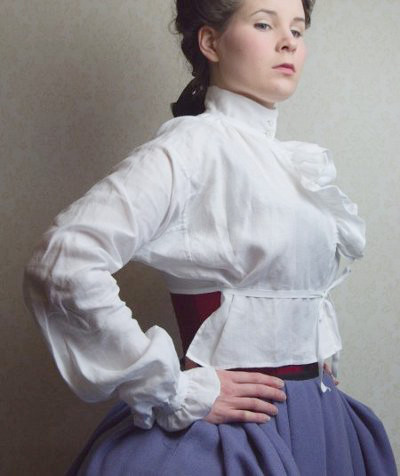
Habit shirt is a special shirt worn under a riding habit. Like a men's shirt it has high neck, collar and long sleeves. Unlike the normal shift a habit shirt is worn over a corset.
The model for my habit shirt is a museum piece portrayed in C. Willets and Phyllis Cunningtons "The History of Underwear", dated c. 1780. The book gives measurements for the extant garment, which I have altered to fit me.
The short back of the shirt is gathered at the center. The front is longer, and tapes at the side seams are tied in the front to keep it in place. The shirt opens at the front, which makes dressing much easier.
I sewed the seams with machine but flat felled them by hand, and also made all the gathering and hemming by hand. I also made the Dorset thread buttons on plastic rings. A good tutorial for making them can be found here.

In case someone else of about my size should need measurements for a habit shirt, I'll add them here. They are altered from the original, so it's my interpretation of how the garment should fit. Measurements include 1cm seam allowances unless the finished measurements are given instead.
Body: width 60cm, lenght 70cm.
Shoulder line 32cm measured up from the back hem.
Cut the neck slit leaving 12cm on both edges. Insert 6cm (4cm finished) wide shoulder piece and a 8x8cm neck gusset like in a men's shirt. The finished shoulder lenght will thus be about 16cm.
The remaining neck slit can be curved at the front, the cut away being 3cm deep at the front edge. This is not period correct but works better, but if you want to be period skip this. The back is not lowered. Gather the back of the neck (between the gussets) to about 13,5cm, and the rest to match the collar lenght. My finished collar is 38cm long (including the scanty buttoning allowance) and 5cm high.
Cut the neck ruffles 7x42cm, gather to 21cm down from the collar.
The center of the back hem between 13cm from each side is gathered to 21cm, the finished back width thus becoming 47cm. The side seam under the gussets is about 2cm, add here ribbons which will be tied in the front.
The underarm gussets are 15x15cm.
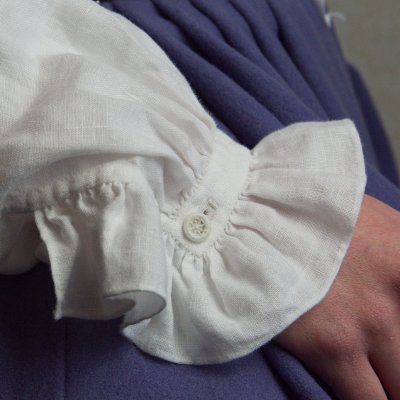
The sleeves: 62x36cm. The side slits: 7cm. The cuff widht (finished) 2cm, lenght your wrist circumference + ease + seam allowance + buttoning allowance. The ruffle, 6x60cm, is gathered between the the cuff top and underside and at the slit the gathering is covered with a band of linen.
There is an even better way to make your waist look small than just lacing it tight: Make sure your skirt is big! The big skirt and a nice optical illusion about tiny waist is achieved with padding and hoops.
My first 18th century dress was an Robe l'Anglaise, which did not have the wide hoops characteristic of mid-century underneath it any more. At first I though that would save me the trouble of making any kind of skirt support at all, my not so slender hips and petticoats being enough. But when I tried on my under-petticoat and the petticoat of the skirt, I experienced something new: For the fist time in my life I thought my bum was looking too small.
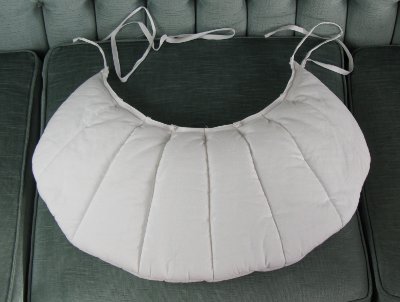
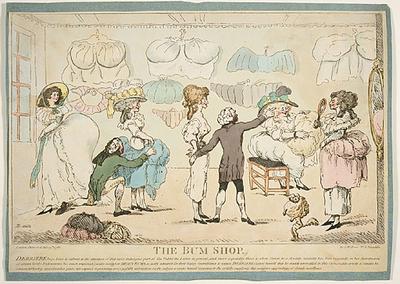
The period solution looked somewhat like the picture on the right. Mine is stuffed with polyester padding instead of cork, though, and machine-sewn completely, and in a way that does not bear closer inspection, too. I was in a hurry to get on with the dress project...
On my next polonaise I wanted an even bigger skirt, so at first I was going to make a bigger bumroll. Then I got the idea to try the polonaise over my old bumroll and my quilted petticoat, which together gave it a lovely puffy look. Then I began to wonder if the quilted petticoat would bee too hot in a ball. I ended up finding a haf-way solution, the idea stolen from Demode Couture (scroll the page down.)

On the fabric store there happened to be a remain piece of quilt just the size I needed, and it was even in pretty pink gingham. As I was in a hurry I abandoned all concerns of period-correctness and finished the edges with overlock. I sewed a strip of old sheet on the top to avoid too much bulkiness at the waist, and pleated it on a waistband. The waistband has loops at the front corners through which the ribbon ties in the bumroll are threaded. To further stabilize it I added ties at the back and corresponding loops on the bumroll.
The quilted bumroll cover is brilliant, as it gives the skirt nice added volume and is nevertheless easy to pack, which is always a concern as the re-enacting events tend to happen far from home.
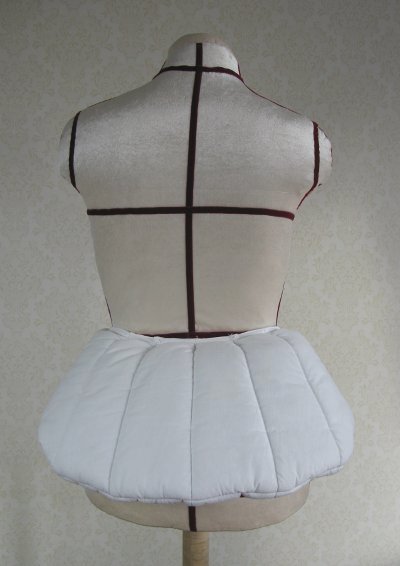
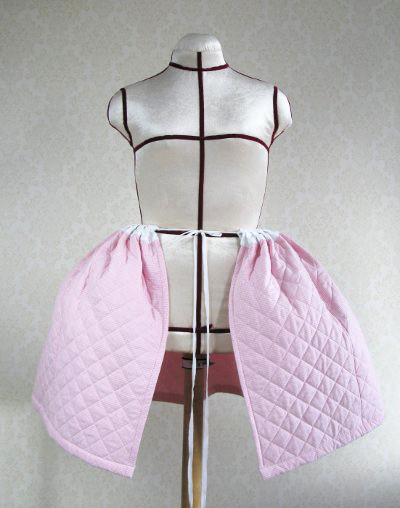
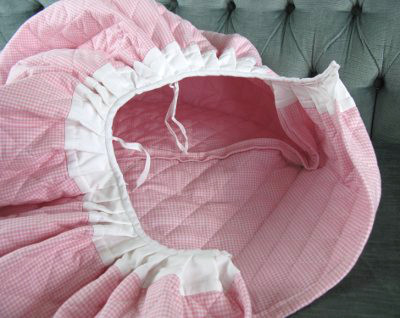
When making a 1780s roundgown I realised that my skirt supports needed updating to a new decade. "The American Duchess guide to 18th century dressmaking" - book has great instructions for making a "Split rump" to give the right shape to 1780s dress skirts.
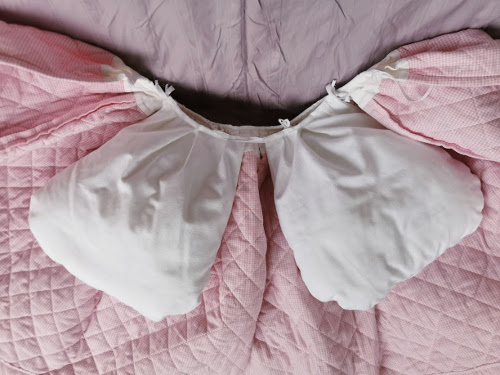
I cut the pouches a bit wider than in the book pattern to be sure and pinned them on my dummy to pleat the upper edge. I deviated from the book instructions a bit by discarding the skirt part and instead setting the pouches on a waistband furnished with ribbon loops. Then I sewed a few more ribbon ties to the waistband of my old quilted bumroll cover, so I could fix the stuffed pouches on it. I put the pouches under the skirting with the idea that the quilted fabric would soften the bumps and smooth the silhouette, and I think it worked quite well.
Pocket
hoops, 2008 / 2010
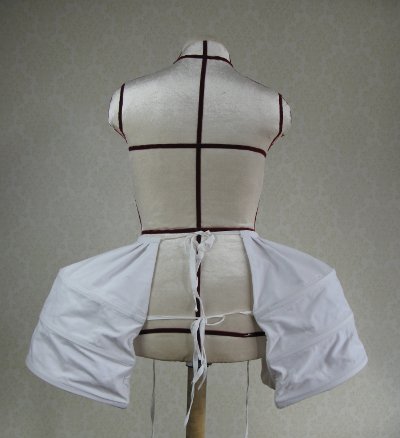
As I'm not at the moment fancying grand, wide court dress, more modest pocket hoops will do quite well for my 18th century projects. They are also relatively easy and careless to wear.
I began the pocket hoops with the Butterick pattern that came with the stays pattern, though I diminished the width at once to more moderate 60cm bones. According to the pattern instructions I made the pieces with two layers of material and stitched the boning channels to them.
The rare
delight of making swift progress according to a provided
pattern was however short lived. When I got to try the hoops
on I realised that the shape was far too boxy for my liking.
Interrupting a project which should have been easy for further
developing of the basic pattern is disheartening, and as I
wouldn't even have use for pocket hoops for some time (having
decided to make a polonaise first), I abandoned this project
for indefinite time. Much later, when I began to plan a Pet en
l'air, I had to continue the pocket hoop project too. First I
considered making a fresh start with a whole new pattern, as
the material was inexpensive after all, but as I was trying on
the old ones to figure out what I should do differently I
decided I could as well try to salvage them first. The pattern
provided by Tidens
toj was of some help.
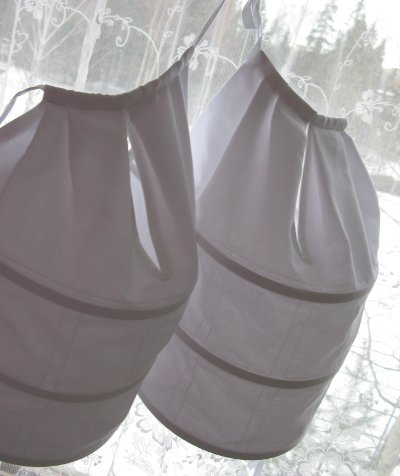
For the first
thing I took out the vertical bones, as many of the ones I had
seen (both museum pieces and reproductions) had only
horizontal ones, and the vertical bones would prevent the
hoops from collapsing, which in theory sounds fine – until you
sit down. I also cut the base piece slightly rounded on the
inner side, making it thus fit more smoothly against the leg.
Then I took off about 3,5cm from the top of the boned section
so that the horizontal bones narrowed a bit upwards, creating
a more slanted and less boxy silhouette. At first I intended
to have the hoops sit a bit lower on the hips for a yet more
rounded silhouette, but when I tried it on with petticoats I
realized that actually a bit more sharp angle at the waist
looked more right in the end, so I gathered the waist anew.
The hoops also felt more likely to stay in their place now,
when walking did not move them as much.
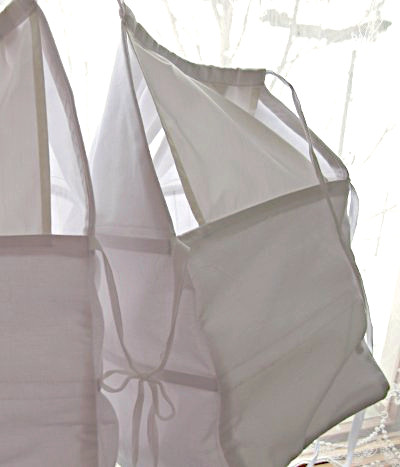
I sewed the pocket hoops together somewhat hastily, all by machine and using bias-tape to finish the seams inside the pocket hoops. The material is cotton-polyester, the bones 1cm wide steel boning. The Butterick pattern had the inner side from the boning upwards open, which makes the construction and gathering the waist easy but when trying on felt like inner side would slip downwards too easily. I ended up adding pieces of the first white material I found. It was considerably lighter so it didn't add any extra bulk on the already heavy waist. I had bit of a struggle to get the heavy, two-layered main material neatly pleated in the waist, and in the end I had to make the front and back different – it seems nothing works on my big butt without adjusting. Oh, well.
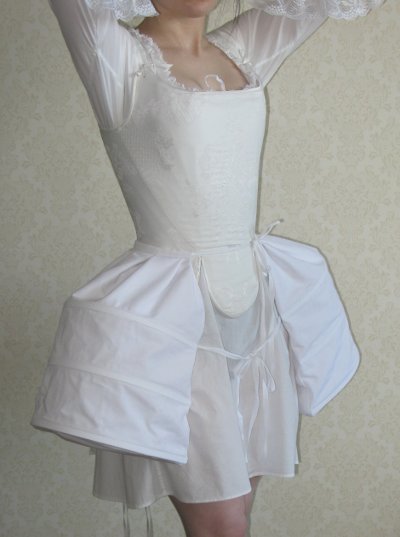
At some point I got really irritated with myself for wasting so much time on a simple, non-visible project like this, but in the end I think that maybe my effort paid off after all. I'm rather happy with the shape, and time will show how they work on wear. The one thing I doubt a bit are the tapes tied between the hoops, often seen at the museum pieces, as it felt like they just pulled the hoops upwards when walking (or perhaps I just don't take small enough steps). Also when trying on it seemed that the weight of the petticoats alone would work quite well in keeping the hoops in their place, and the uppermost tie on the back was good in preventing the hoops from sliding in the front, but didn't restrict movements. I kept the tapes anyway, I'll have to experiment what option works best when actually wearing them.
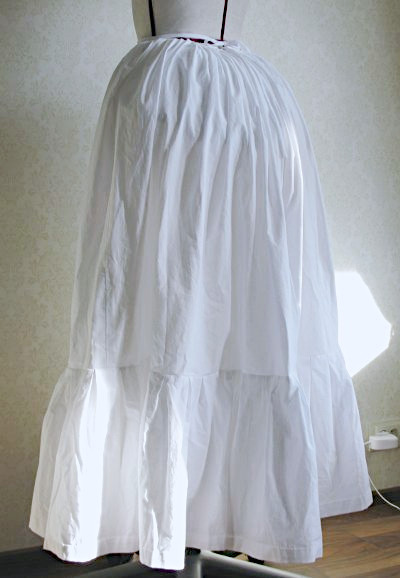
A dress requires at least one under-petticoat, even if you don't have hoop lines to cover. This very simple and functional under-petticoat of mine is made of bed sheet cotton. The side seams are left open for 15cm at the top, and the front and back are pleated into separate narrow waistbands, which are tied round the waist, a method which gives the waist a fit that can be easily adjusted. The waist is put together with machine, but the hem and the ruffle are finished by hand.
In the picture the under-petticoat is worn with a bumroll, but it works relatively okay with hoops too.